Welcome to HelpDX
Your Complete Support Solution for Business
Introduction
HelpDX is a powerful Laravel-based application designed to streamline customer support and service management for businesses of all sizes. This documentation will guide you through the features, setup, and usage of the HelpDX application, providing a complete understanding of how to get the most out of your support system.
What is HelpDX?
HelpDX is an all-in-one support management system built with Laravel, designed to simplify and enhance the customer support experience for businesses. It empowers teams to manage inquiries, streamline internal workflows, and deliver consistent support through a wide range of customizable tools.
HelpDX is more than just a ticketing system—it is a complete support ecosystem that includes user management, knowledge sharing, training, and system-wide control. Whether you're running a SaaS product, managing client support for a service business, or need an internal HelpDX for your organization, HelpDX offers the flexibility and scalability to meet your needs.
Key Features
-
Google Meet Integration:
Generate meeting links directly in the system for virtual support sessions - no external tools needed. -
User Management:
Control access with multiple roles (Admins, Co-Admins, Customers) and customizable permissions. -
Office Hours Management:
Set business hours, closures, and holidays to manage customer expectations and support availability. -
Ticket Configuration:
Customize ticket tags, priority levels, and create quick-response macros for efficient support. -
Ticket System:
Customers submit tickets while support teams track, respond to, and resolve issues in one organized workflow. -
Personal Notes:
Secure space for users to keep private documentation, reminders, and reference materials. -
Internal Training System:
Upload training videos and resources to onboard and upskill support staff within the platform. -
Custom Pages:
Create and manage additional content pages (announcements, policies, guides) without coding. -
FAQ Management:
Build and maintain a searchable knowledge base of common questions and answers. -
Knowledge Base:
Organized library of help articles, tutorials, and documentation for customer self-service. -
Newsletter System:
Manage subscriber lists and send email campaigns to both registered and non-registered users. -
CMS Settings:
Central admin dashboard to configure all system settings, permissions, and integrations. -
Profile Management:
Users can update their personal information, preferences, and account settings. -
Update Center:
One-click system updates to ensure you always have the latest features and security patches.
How HelpDX Works
HelpDX is designed to simplify support operations for businesses by organizing communication between customers and support staff through a structured ticketing system. Here's a high-level overview of how it works:
-
User Registration:
Customers or users can register on the platform or submit tickets as guests, depending on your configuration. -
Ticket Submission:
Users can submit a support ticket by selecting a category, setting priority, and describing their issue. They can also attach files if needed. -
Admin/Co-Admin Response:
Once a ticket is submitted, Admins or Co-Admins receive a notification and can respond directly through the dashboard. They can use macros for faster replies. -
Ticket Management:
Tickets are categorized using tags and priorities. Admins can assign tickets, change their status (open, pending, resolved), and archive completed ones. -
Google Meet Integration:
Generate video meeting links directly within the system for customer support sessions.To Generate meeting link no need to leave the system. -
Internal Collaboration:
Co-Admins can collaborate using the training system and personal notes for internal documentation or shared knowledge. -
Knowledge Access:
Customers can view FAQs and the Knowledge Base to find answers before submitting a ticket, reducing the load on support staff. -
Communication:
Admins can send newsletters and direct messages to registered and unregistered users to keep them informed. -
System Updates:
Admins can update the application via the Update Center to receive new features and security patches.
Technical Details
This section provides the system requirements and basic server commands needed to install and run the HelpDX application efficiently.
System Requirements
- PHP version:
8.3or higher -
Enabled PHP extensions:
curlzipopenssl(optional but recommended)
- Minimum Disk Space:
2GBfree storage - Web Server: Configured for PHP and Laravel (Apache, Nginx, etc.)
- Database: MySQL 5.7+ or MariaDB
- Composer: Required for dependency management
- Node.js & npm: Required for compiling frontend assets (optional)
Common Artisan Commands
-
php artisan serve- Starts a local development server athttp://localhost:8000Quick way to test your application during development -
php artisan config:clear- Clears cached configuration filesUseful when configuration changes aren't appearing -
php artisan migrate- Runs all pending database migrationsCreates or modifies database tables according to your migration files -
php artisan db:seed- Populates database with sample dataUses seeders defined indatabase/seedersdirectory
How to Install HelpDX
Follow these easy steps to install and configure HelpDX on your server in just a few minutes.
Installation Requirements
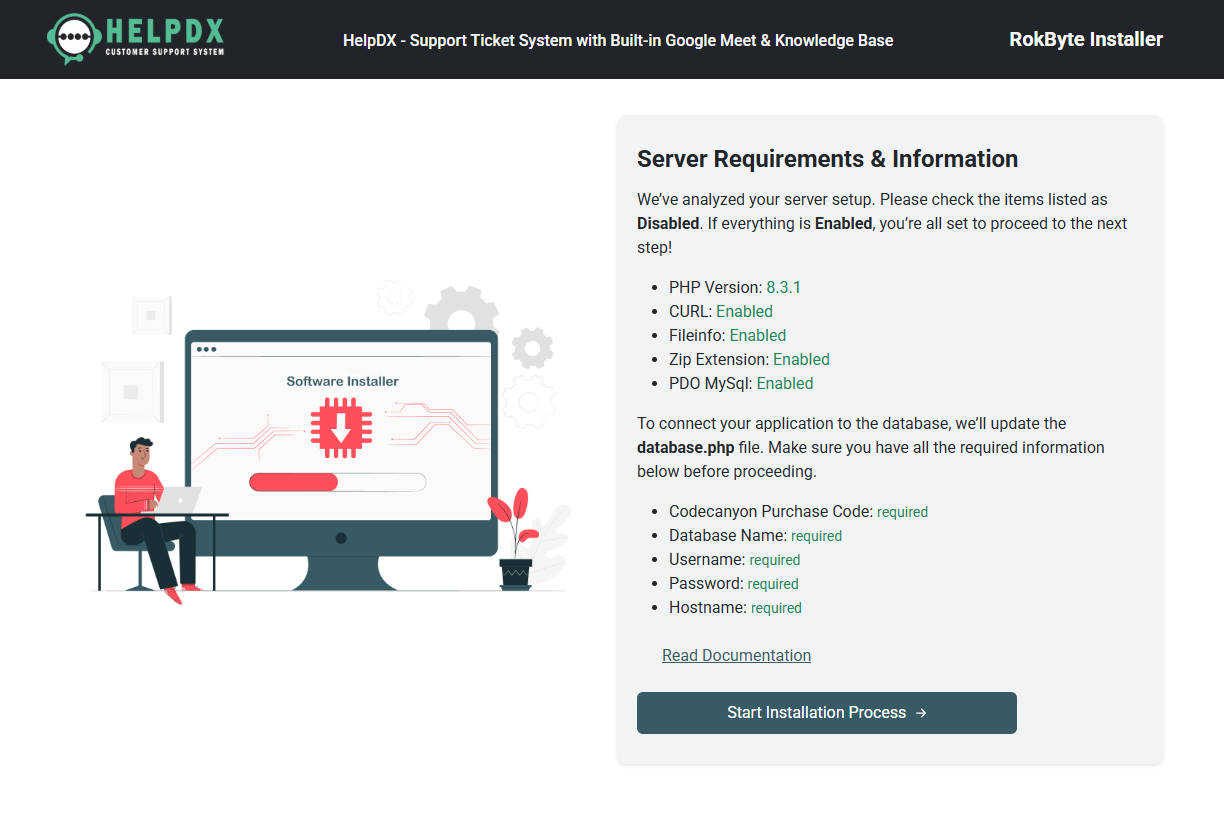
After uploading the project files to your server, open your domain
(e.g., yourdomain.com) in the browser.
The installer will appear. If everything is enabled, click the
Next button to continue.
- PHP 8.3 or higher
- MySQL 5.7+ or MariaDB 10+
- Apache/Nginx Server
- PHP Extensions: OpenSSL, PDO, cURL, Fileinfo, Zip
-
Write permissions for folders:
/storage,/bootstrap/cache,/uploads,/database
Step 1: License Agreement
After starting the installation, enter your CodeCanyon Purchase Code in the required field and click the Next button to continue.
Note: You can find your Purchase Code in your Envato account > Downloads section.

Step 2: Database Information
Provide your database details:
- Database Name – The database you created for HelpDX.
- Database Username – Your database user.
- Database Password – Your database user’s password.
-
Database Host – Typically
localhost.
After filling in the information, click the Next button.
Important: Make sure the database is empty before installation!

Step 3: Administrator Information
HelpDX will automatically configure system files and environment
settings.
If needed, you can manually adjust settings inside the
.env file or /config/database.php located
in the root directory.

Step 4: Installation Complete
Congratulations! Your installation is now complete.
You will receive your default Admin Panel login credentials:
- Email: The email from Step 3
- Password: The password from Step 3
Click the Finish Setup button to access the Admin Dashboard.
Note: For security reasons, please change your default password immediately after your first login.

Post-Installation Checklist
- Configure mail settings to enable email notifications (SMTP).
- Update your company profile and upload your logo in the Admin Panel settings.
Need Support?
If you encounter any issues during installation, please contact our support team through the Support Section on your CodeCanyon profile.
How to Create Users
In this section, you will learn how to create users in the Help Desk system. There are two types of users you can create: Co-Admin and Customer.
How to Create a Co-Admin
Follow these steps to create a new Co-Admin user:
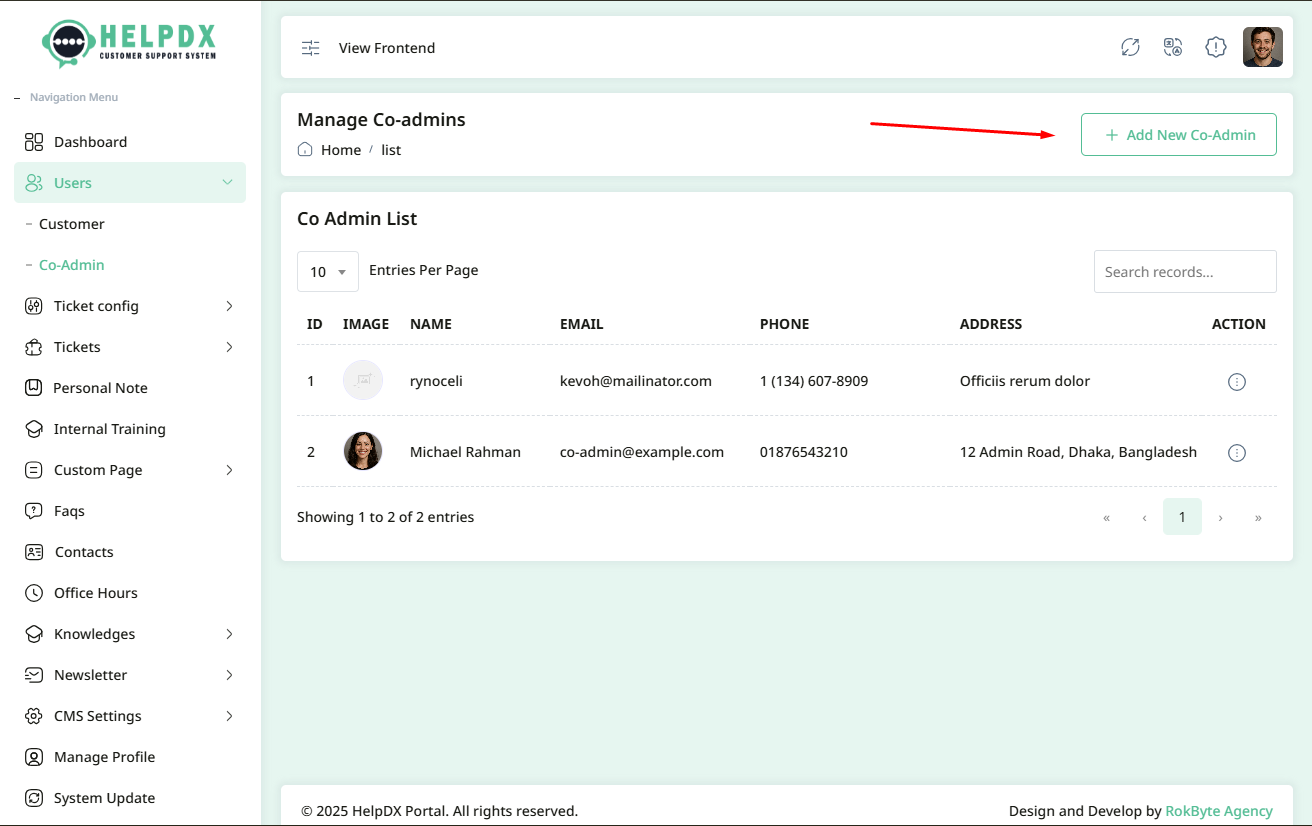
- Login to the Admin Panel.
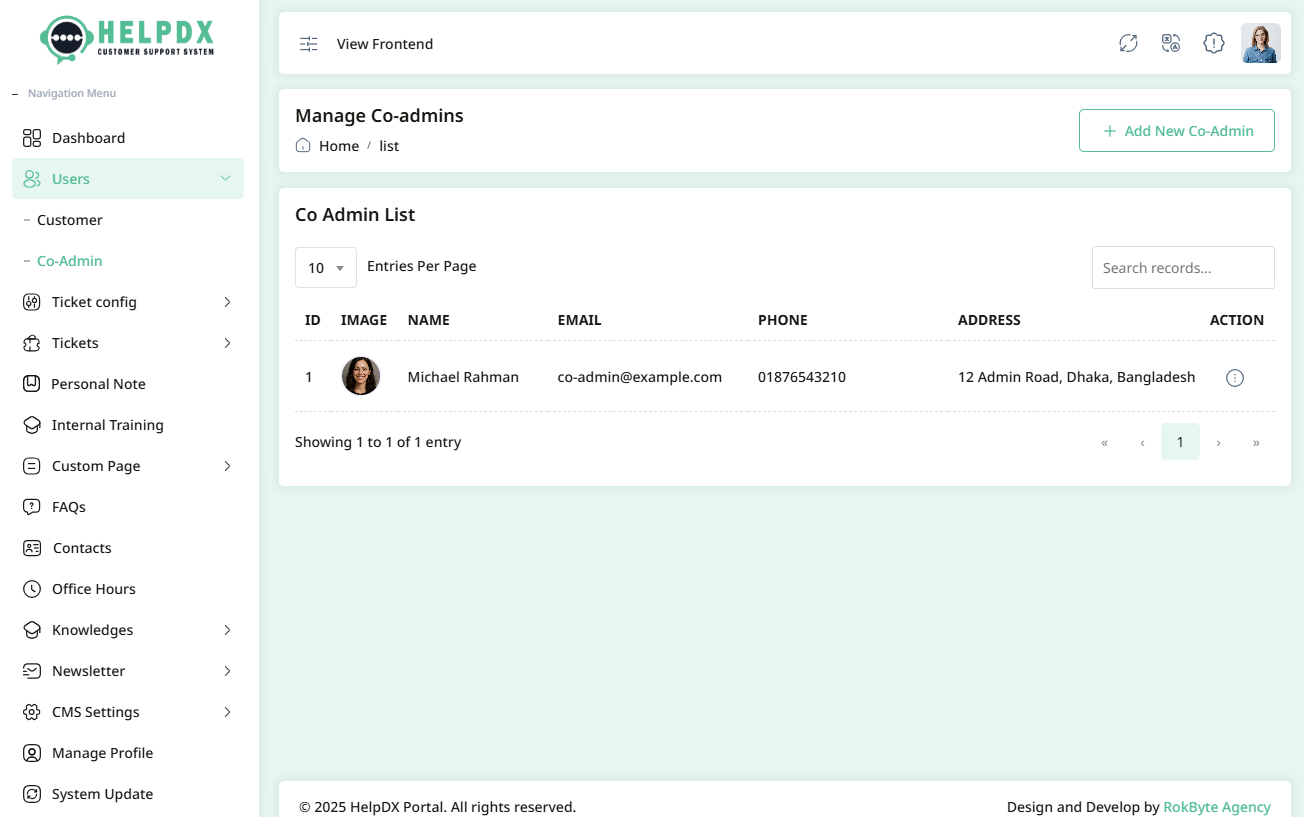
- Navigate to Users > Co-Admin from the sidebar menu.
- Click on the Add New Co-Admin button located on the top-right side.
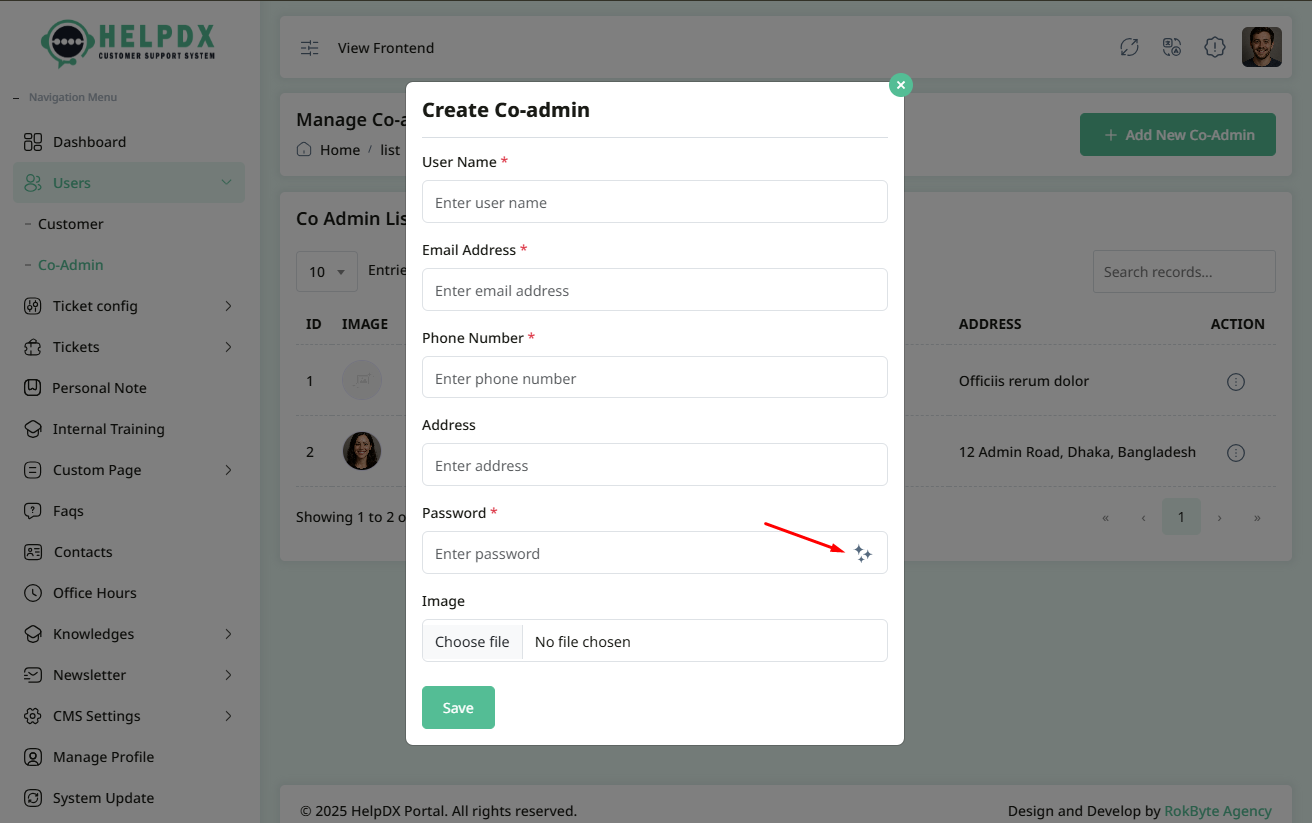
- A new modal form will appear. Fill in the required information for the Co-Admin (such as Name, Email, Password, etc.).
- You can generate password randomly or you can enter as you want
- After completing the form, click the Save button to create the Co-Admin.
Manage Co-Admin (Edit or Delete)
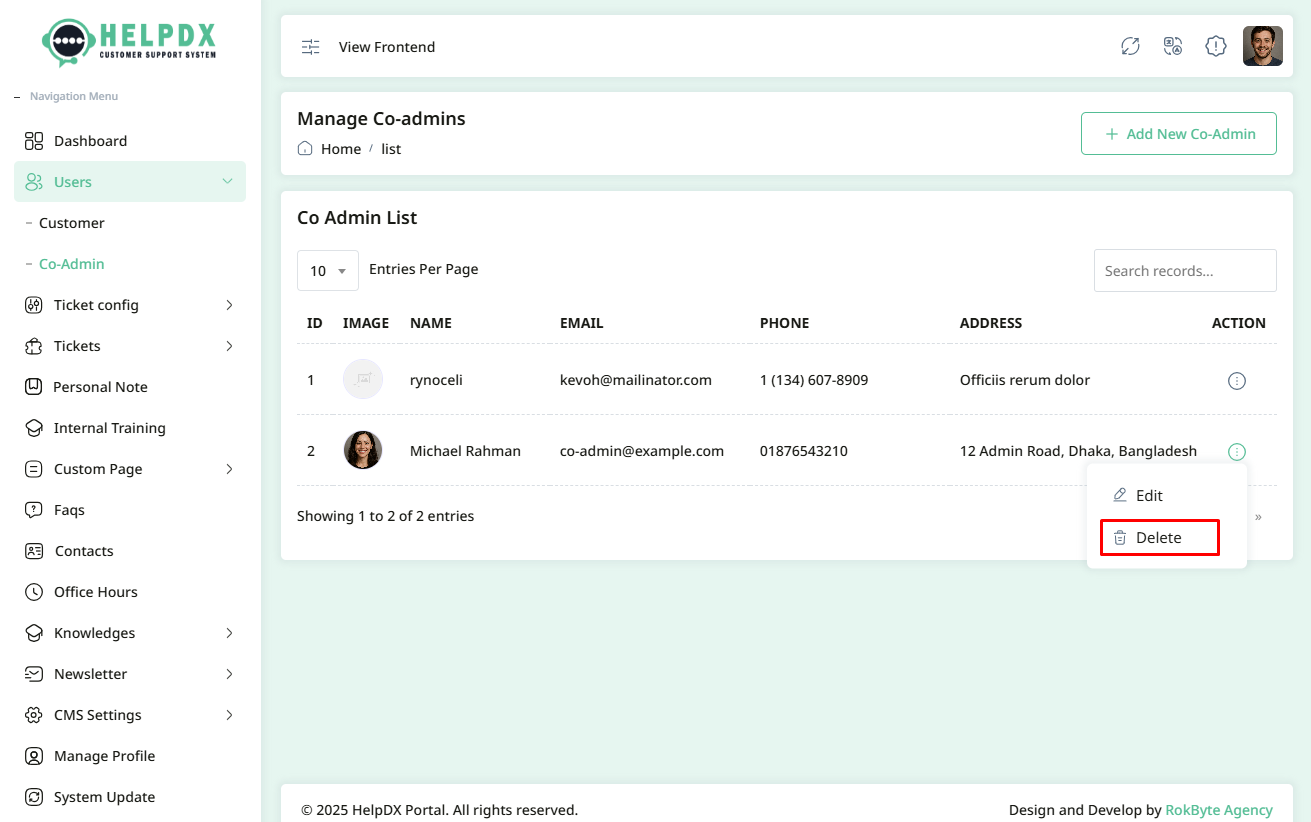
Once a Co-Admin is created, you can manage them from the Co-Admin list:
- Click on the three-dot menu (⋮) beside the table row.
- Select Edit to update their information. A modal with the edit form will appear. Make necessary changes and click Update.
- Select Delete to remove the Co-Admin. A confirmation box will appear. Confirm the action to delete the Co-Admin permanently.
Edit Co-Admin


Delete Co-Admin
How to Create a Customer
The process of creating a Customer is similar to creating a Co-Admin:
- Login to the Admin Panel.
- Navigate to Users > Customer.
- Click on the Add New Customer button.
- Fill in the customer’s details in the form that appears.
- Click Save to create the new customer.
Similarly, you can Edit or Delete a customer using the three-dot menu (⋮) just like you manage Customer.
Ticket Configuration
In this section, you will learn how to configure the ticket system within the Help Desk application. Proper ticket configuration helps streamline support operations and organize customer requests effectively.
We will also cover the following three types:
1. Ticket Tags
Ticket Tags allow you to categorize support tickets for better management and quick filtering (e.g., "Technical Issue", "Billing", "Feature Request").
- Login to the Admin Panel.
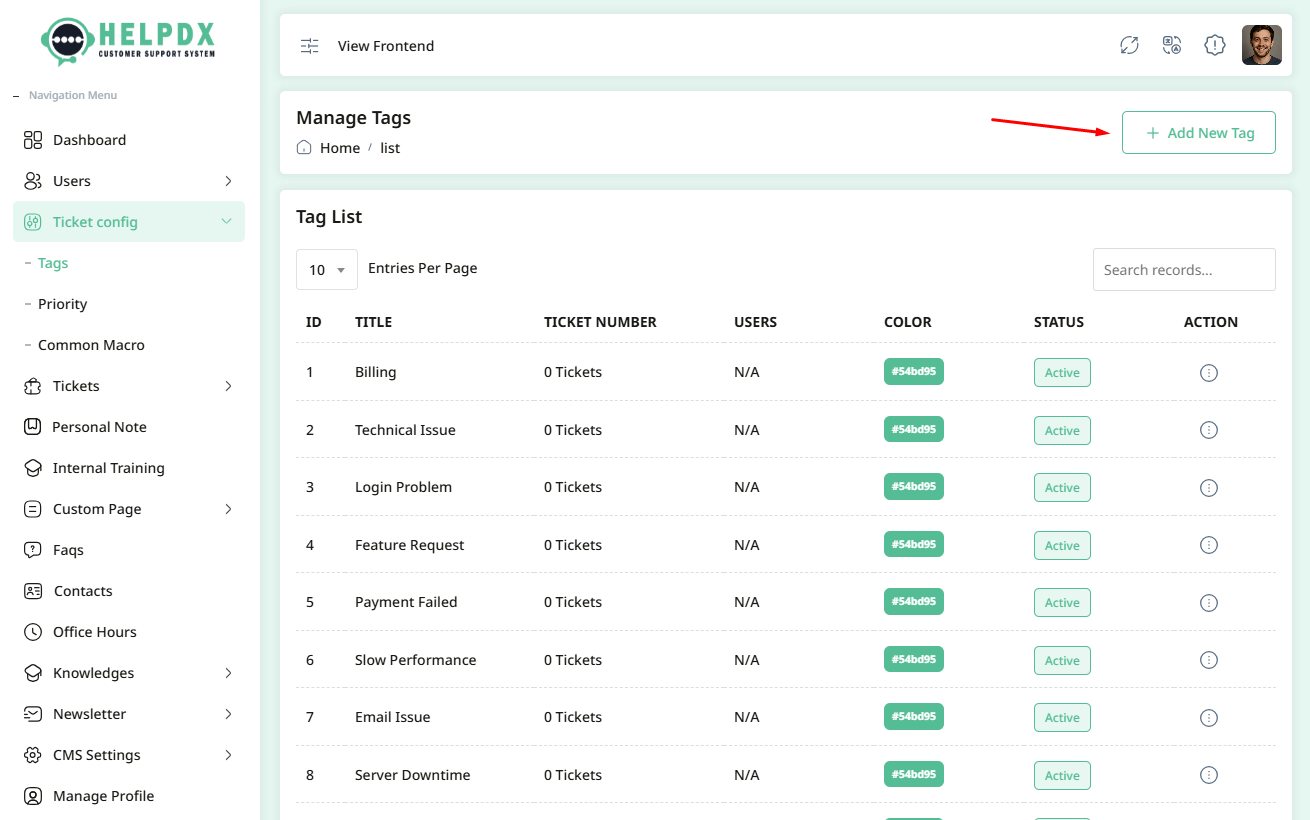
- Navigate to Ticket Configuration > Tags.
- Click on the Add New Tag button.
- Enter the Tag Name (e.g., "Bug Report") and assign a user who will handle tickets created under this tag.
- Select the status as Active or Deactivated. If you select Active, this tag will appear during ticket creation.
- Click the Save button to create the tag.

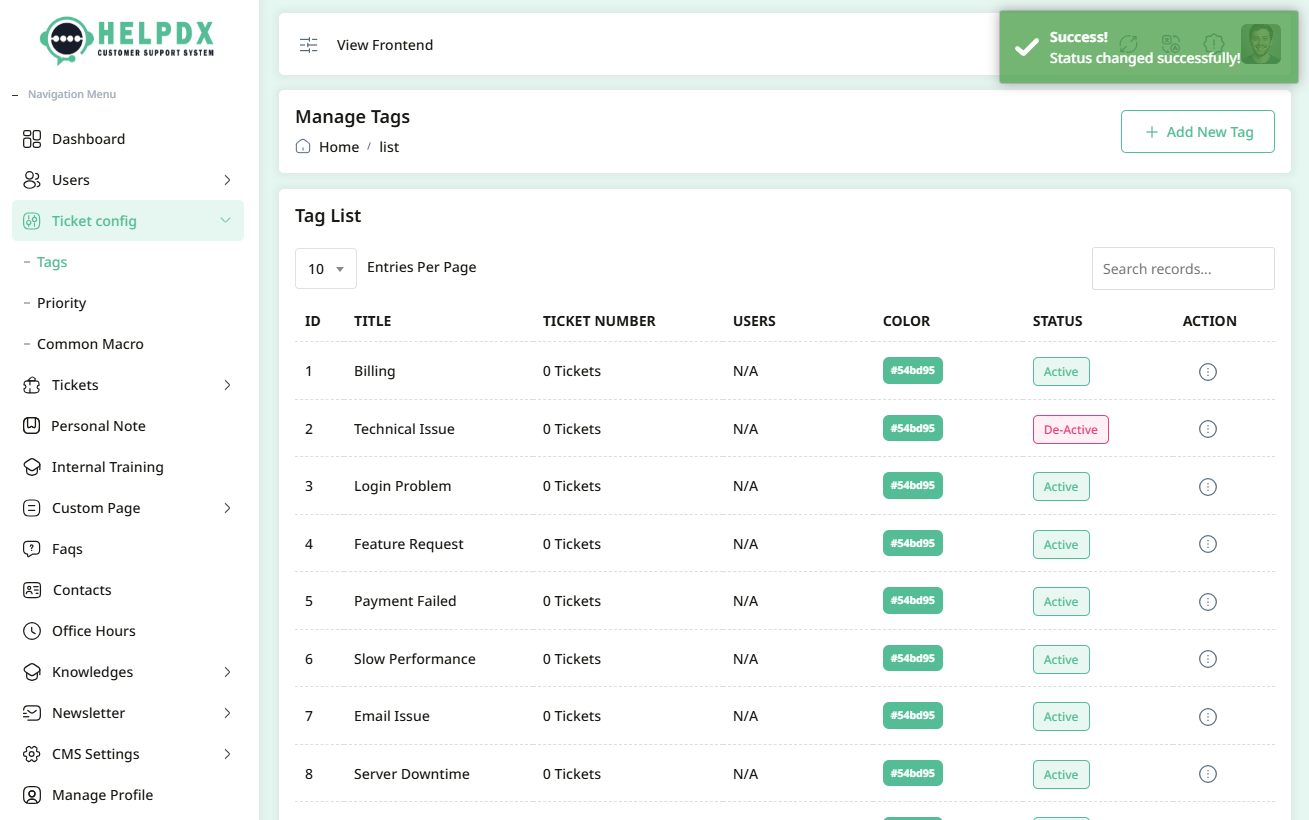
Manage Tags (Edit or Delete or Status Change)
Once a Tag is created, you can manage it from the Tag list:
- Click on the three-dot menu (⋮) beside the table row.
- Select Edit to update its information. A modal with the edit form will appear. Make the necessary changes and click Update.
- Select Delete to remove the tag. A confirmation box will appear. Confirm the action to delete the tag permanently.
- Select Change Status to update the status. When you click the Change Status button, the status will be updated automatically between Active or De-Active..
Edit Tag


Delete Tag


Tag status change

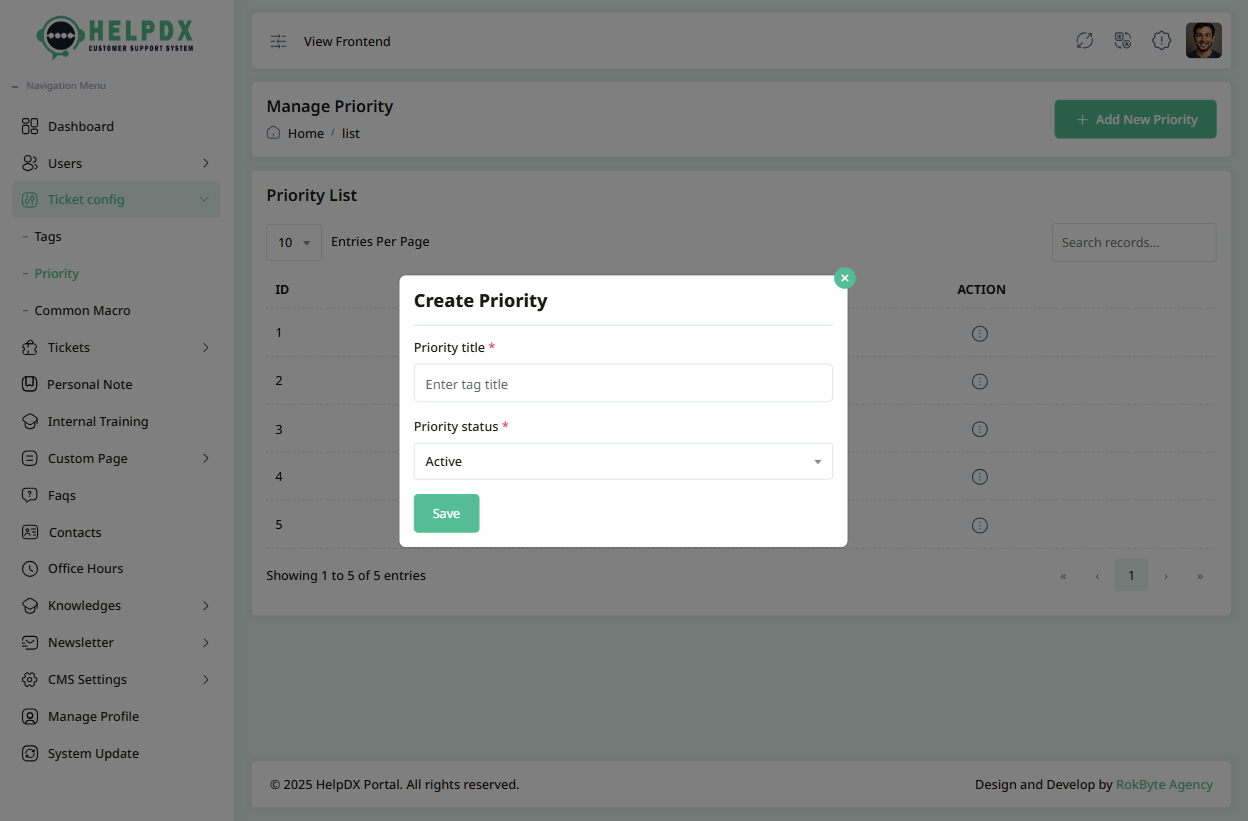
2. Ticket Priorities
Ticket Priorities help determine the urgency of a ticket, allowing support Co-Admins to prioritize tasks efficiently (e.g., "Low", "Medium", "High").
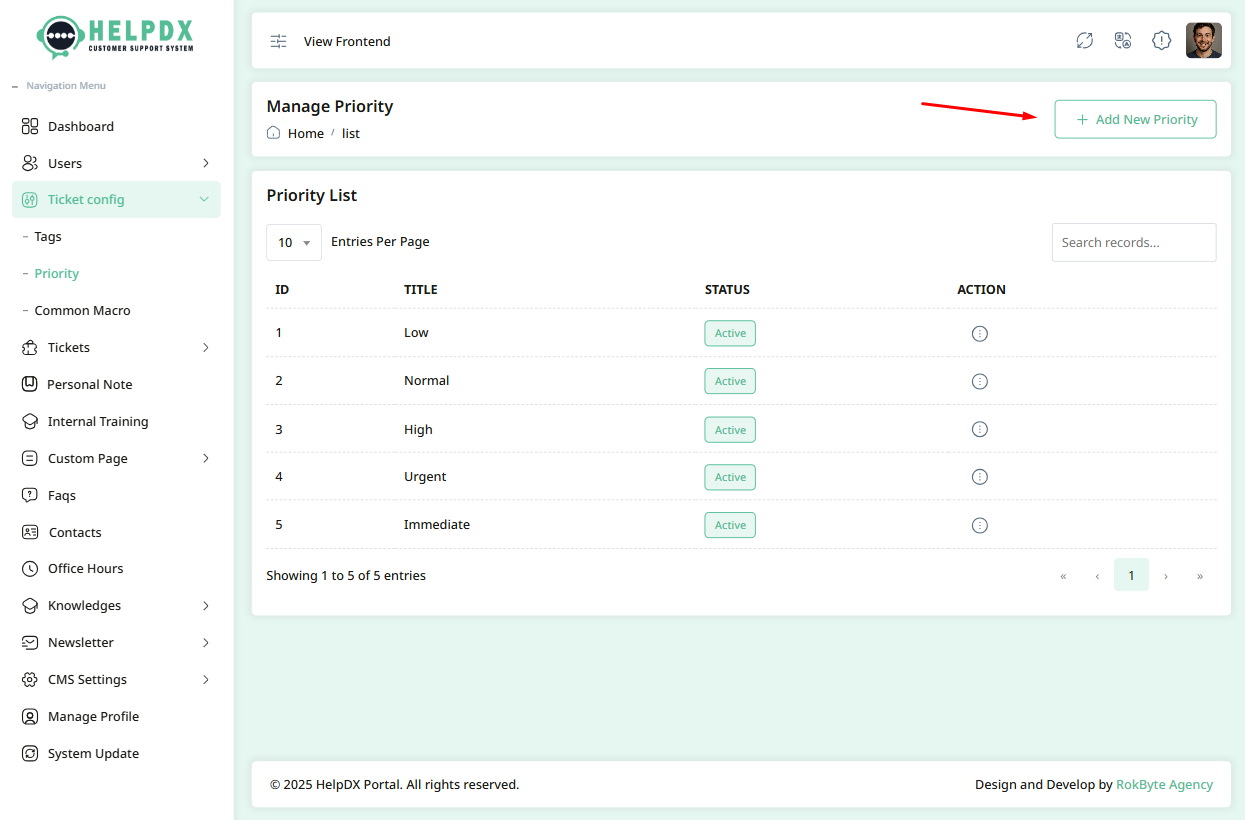
- Go to Ticket Configuration > Priority.
- Click on the Add New Priority button.
- Fill in the Priority Name (e.g., "Critical").
- Select the status as Active or Deactivated. If you select Active, this priority will appear during ticket creation.
- Click Save to add the new priority level.
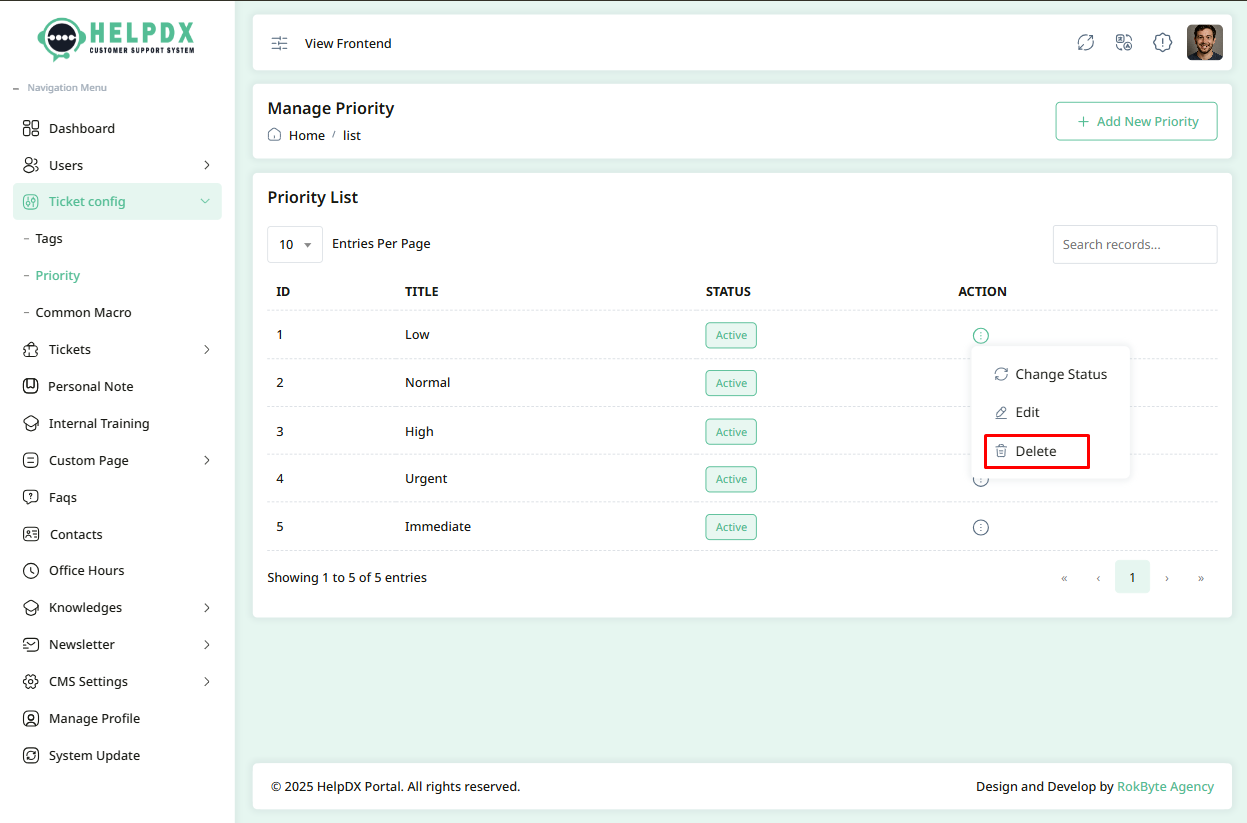
Manage Priorities (Edit or Delete or Change Status)
Once a Priority is created, you can manage it from the Priority list:
- Click on the three-dot menu (⋮) beside the table row.
- Select Edit to update its information. A modal with the edit form will appear. Make the necessary changes and click Update.
- Select Delete to remove the priority. A confirmation box will appear. Confirm the action to delete the priority permanently.
- Select Change Status to update the status. When you click the Change Status button, the status will be updated automatically between Active or De-Active..
Edit Priority


Delete Priority

Priority status change


3. Common Macros
Common Macros are predefined question-and-answer templates that save time by allowing agents to respond to frequently asked queries quickly.
- Go to Ticket Configuration > Common Macro.
- Click on the Add New Macro button.
- Enter the Macro Title and the detailed Answer text.
- Select the status as Active or Deactivated. If you select Active, this tag will appear during ticket creation.
- Click Save to add the macro to your library.


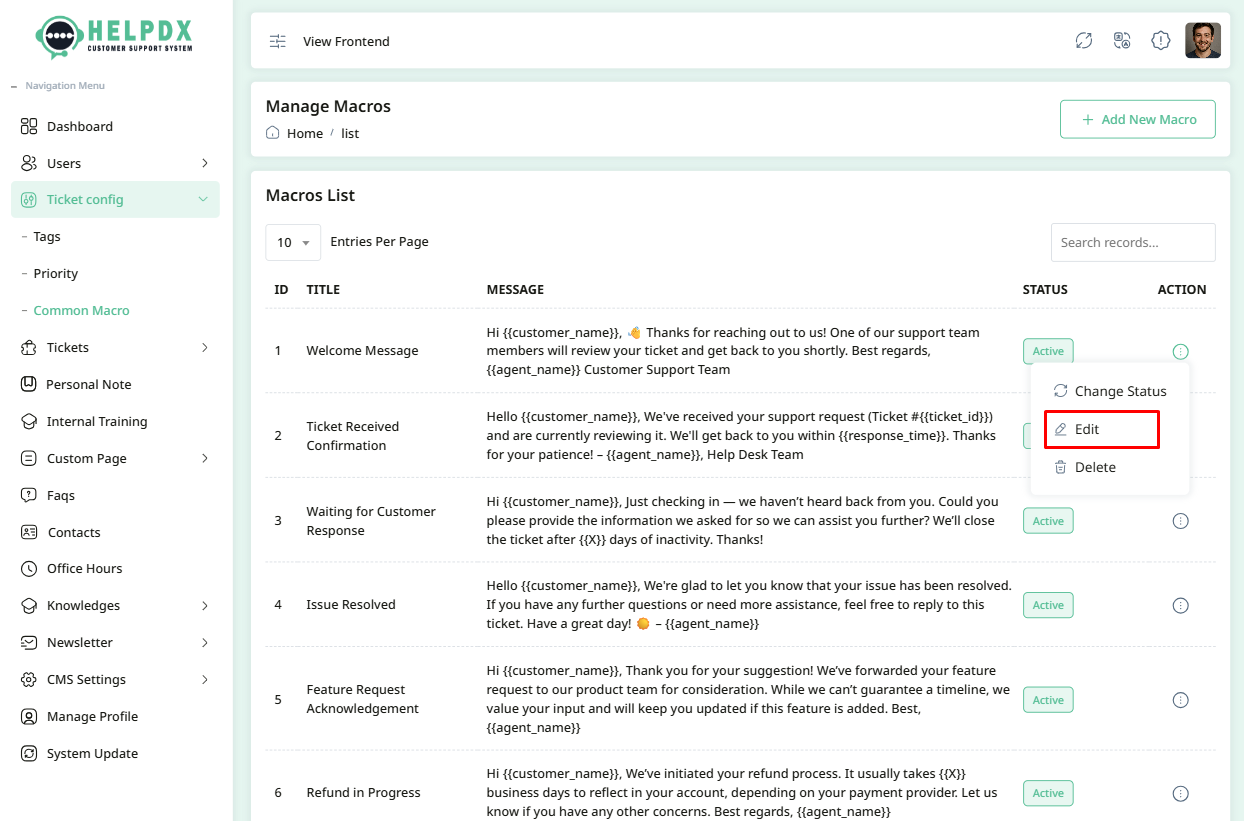
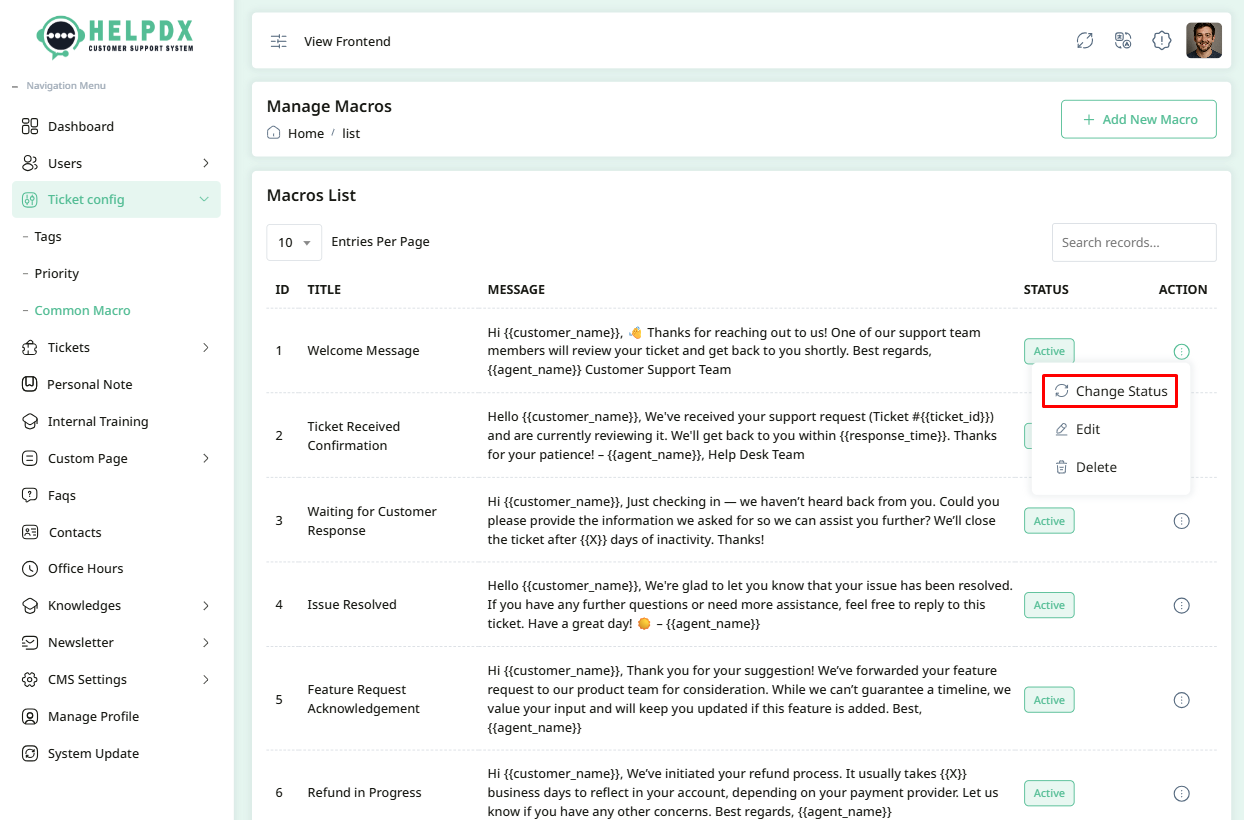
Manage Macros (Edit or Delete or Change Status)
Once a Macro is created, you can manage it from the Macros list:
- Click on the three-dot menu (⋮) beside the table row.
- Select Edit to update its information. A modal with the edit form will appear. Make the necessary changes and click Update.
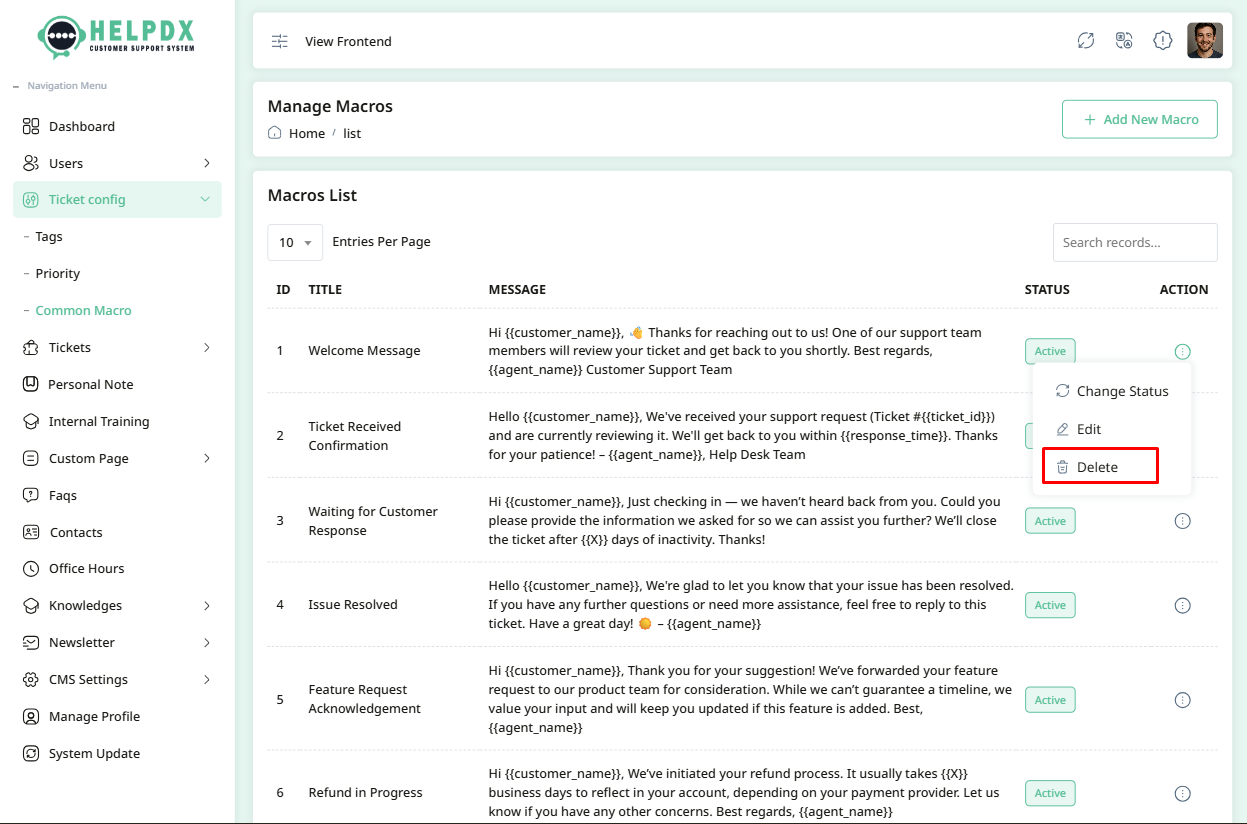
- Select Delete to remove the macro. A confirmation box will appear. Confirm the action to delete the macro permanently.
- Select Change Status to update the status. When you click the Change Status button, the status will be updated automatically between Active or De-Active..
Edit Macro

Delete Macro

Macro status change

After setting up Tags, Priorities, and Macros, your support team will be able to classify, prioritize, and respond to tickets faster and more accurately.
Manage Tickets
here you can manage your tickets
- Login to the Admin Panel.
- Navigate to Tickets from the sidebar menu.
- Click on the Add New Ticket button. Fill all information in the form and submit.
- You will see a list of all tickets with their details (ID, Title, Status, Priority, etc.).
- You can also filter tickets by their status (Open, Pending, Resolved) using the filter options.
- You can also change the view from grid view to list view. You can also sort tickets in ascending or descending order.


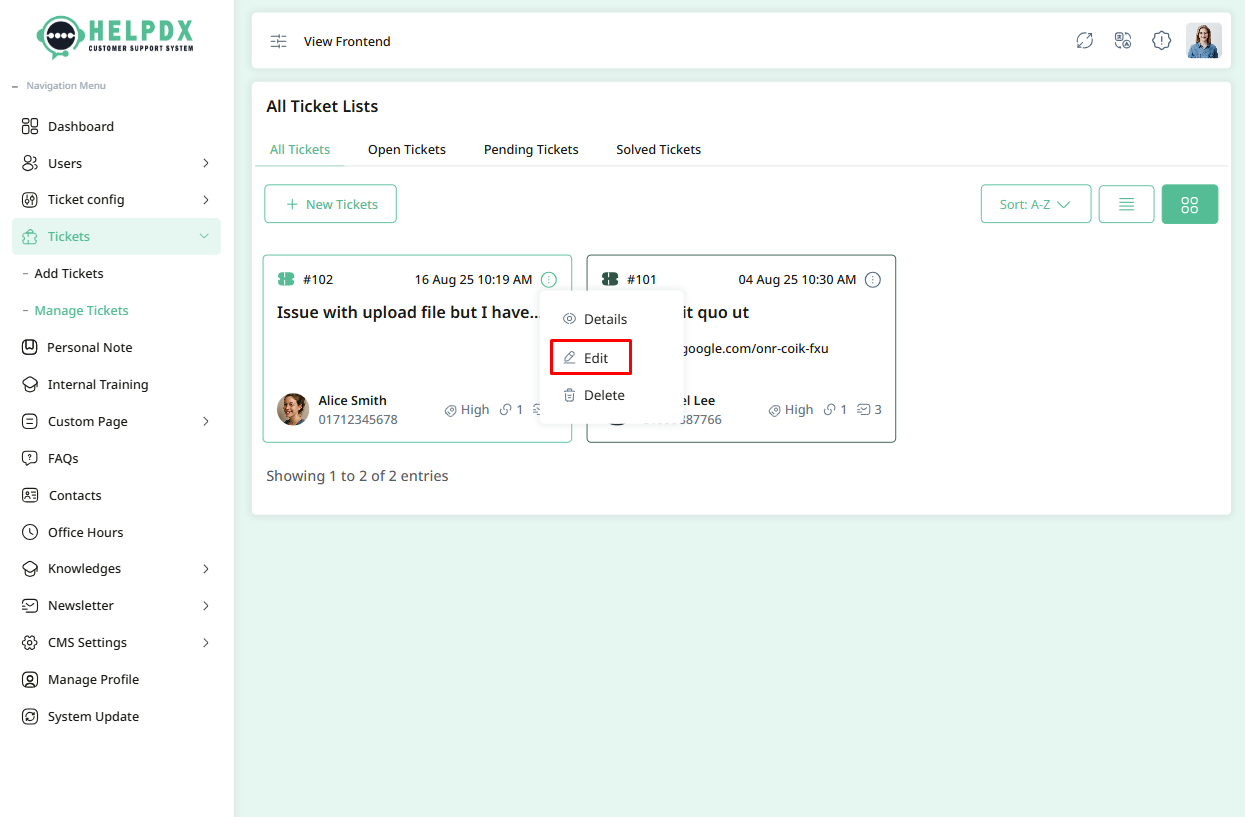
Manage Tickets (Edit or Delete)
Once a Ticket is created, you can manage it from the Tickets list:
- Click on the three-dot menu (⋮) beside the ticket row.
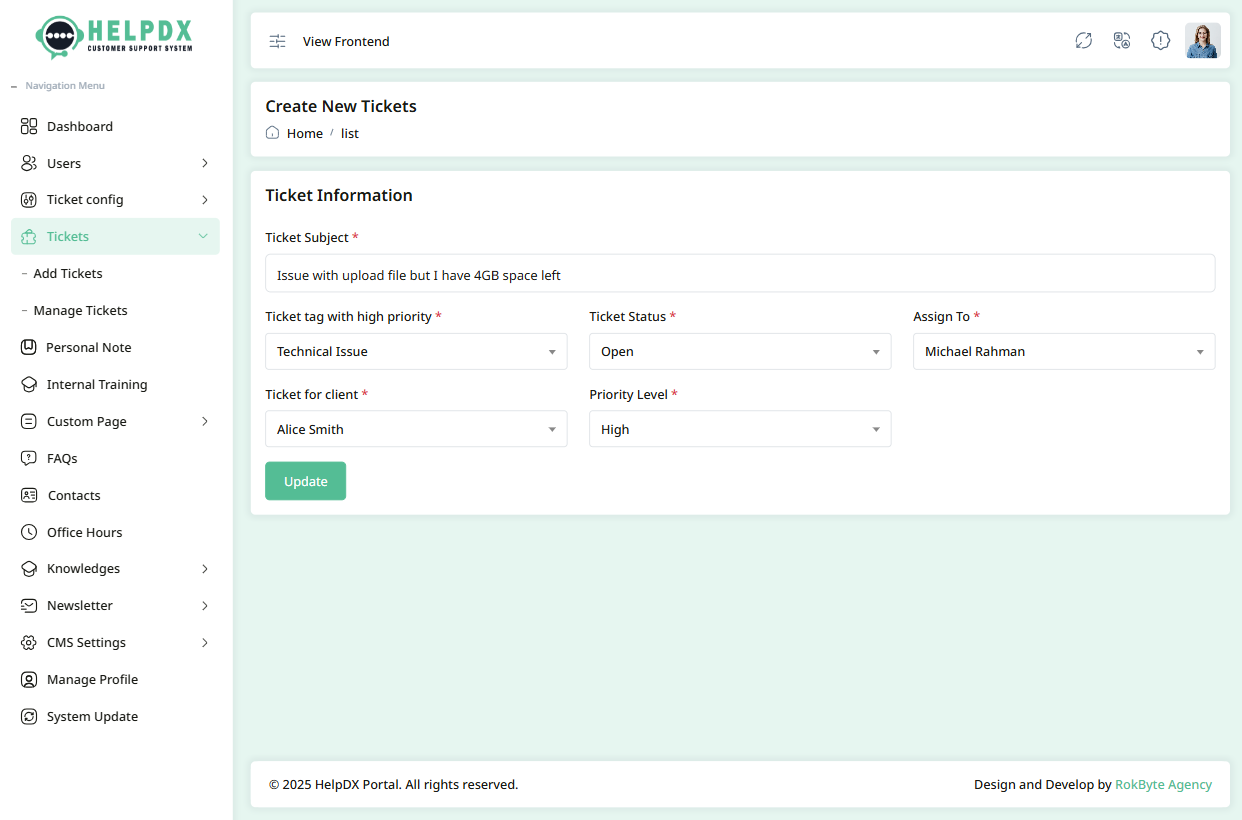
- Select Edit to update its information. A page will be open with the edit form will appear. Make the necessary changes and click Update.
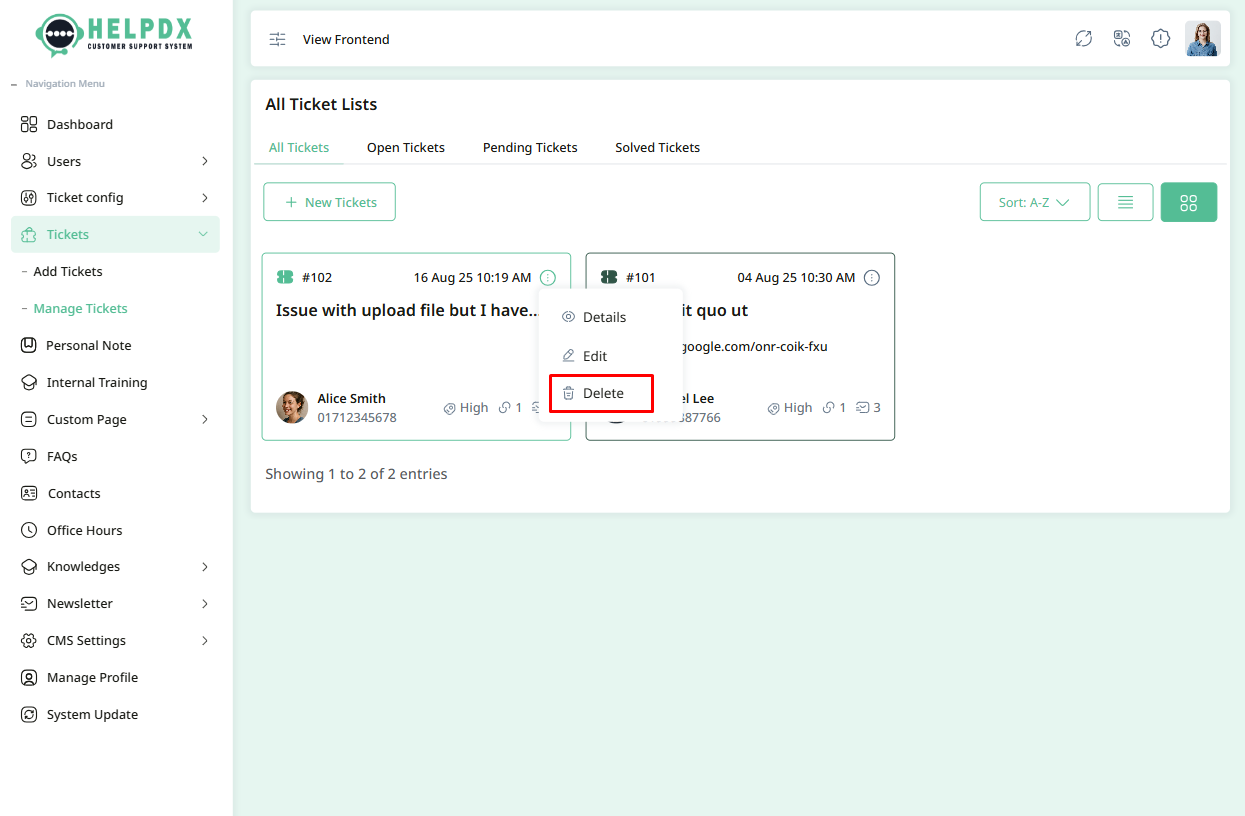
- Select Delete to remove the ticket. A confirmation box will appear. Confirm the action to delete the ticket permanently.
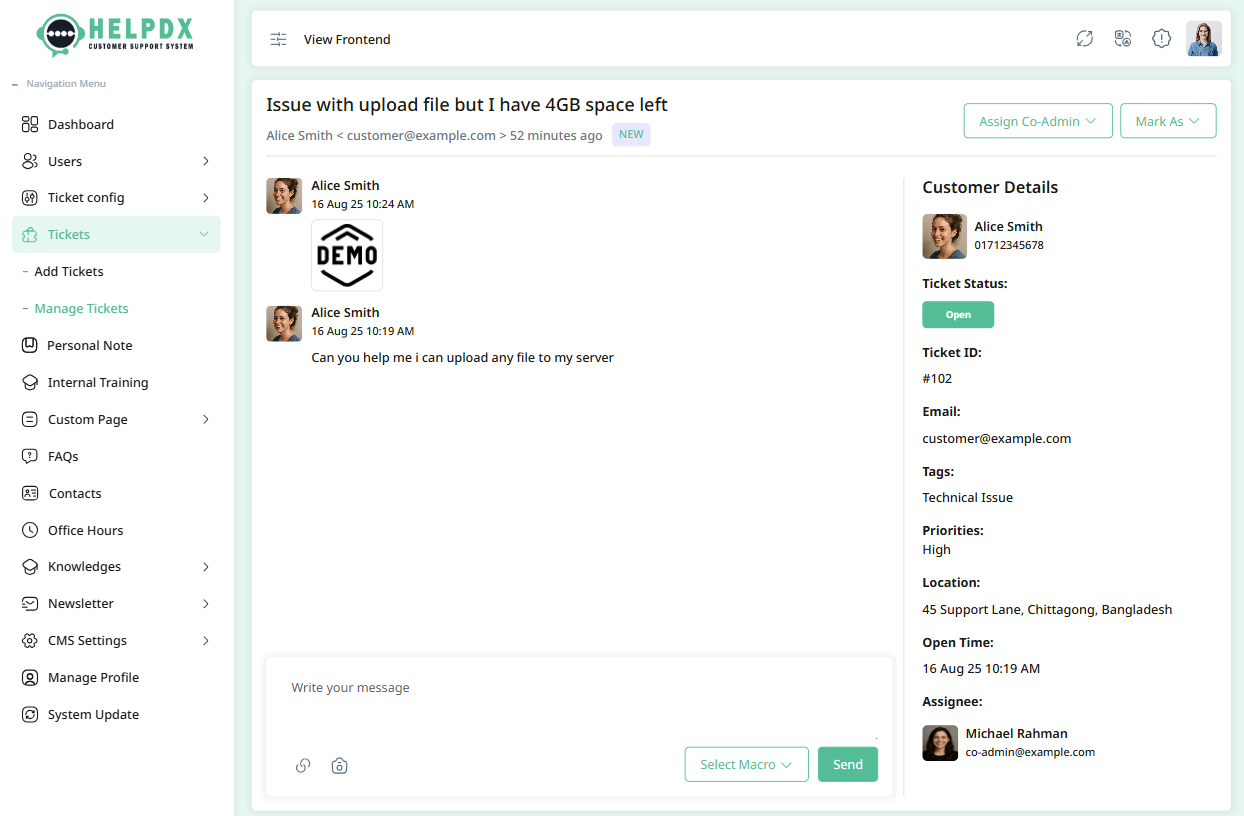
- Select View to see the ticket details. A page will open displaying all information related to the ticket.
- On the ticket details page, you can also message with customer or attach files related to the ticket.
Edit Tickets
Delete tickets
View Ticket Details

Personal Notes
This section is reserved for keeping personal or project-specific notes related to your Help Desk setup and management. You can use it to document custom configurations, reminders, best practices, or any important information for your team.
- Login to the Admin Panel.
- Navigate to Personal Notes from the sidebar menu.
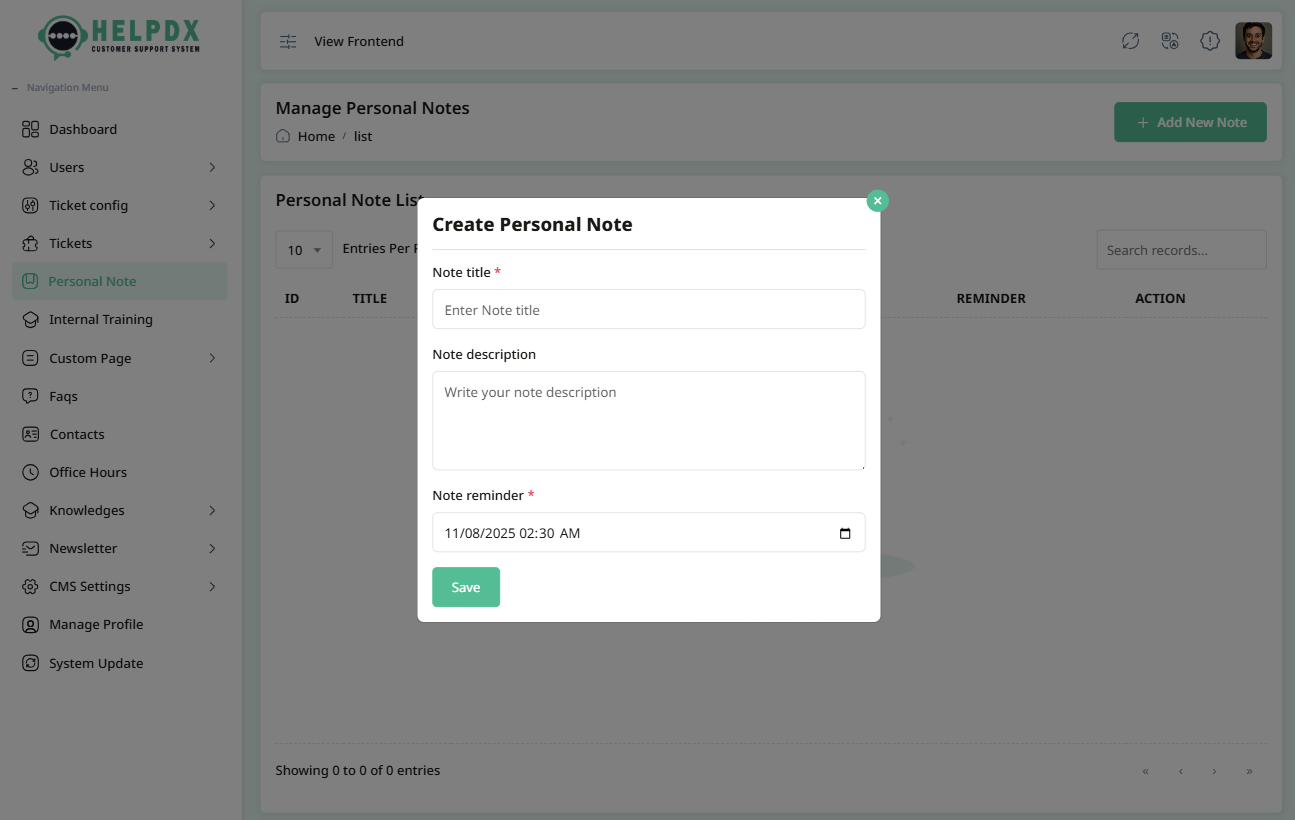
- Click on the Add New Note button located on the top-right side.
- A new modal form will appear. Fill in the required information for the note (such as Title, Description, Note Reminder date).
- After completing the form, click the Save button to create the Personal Note.

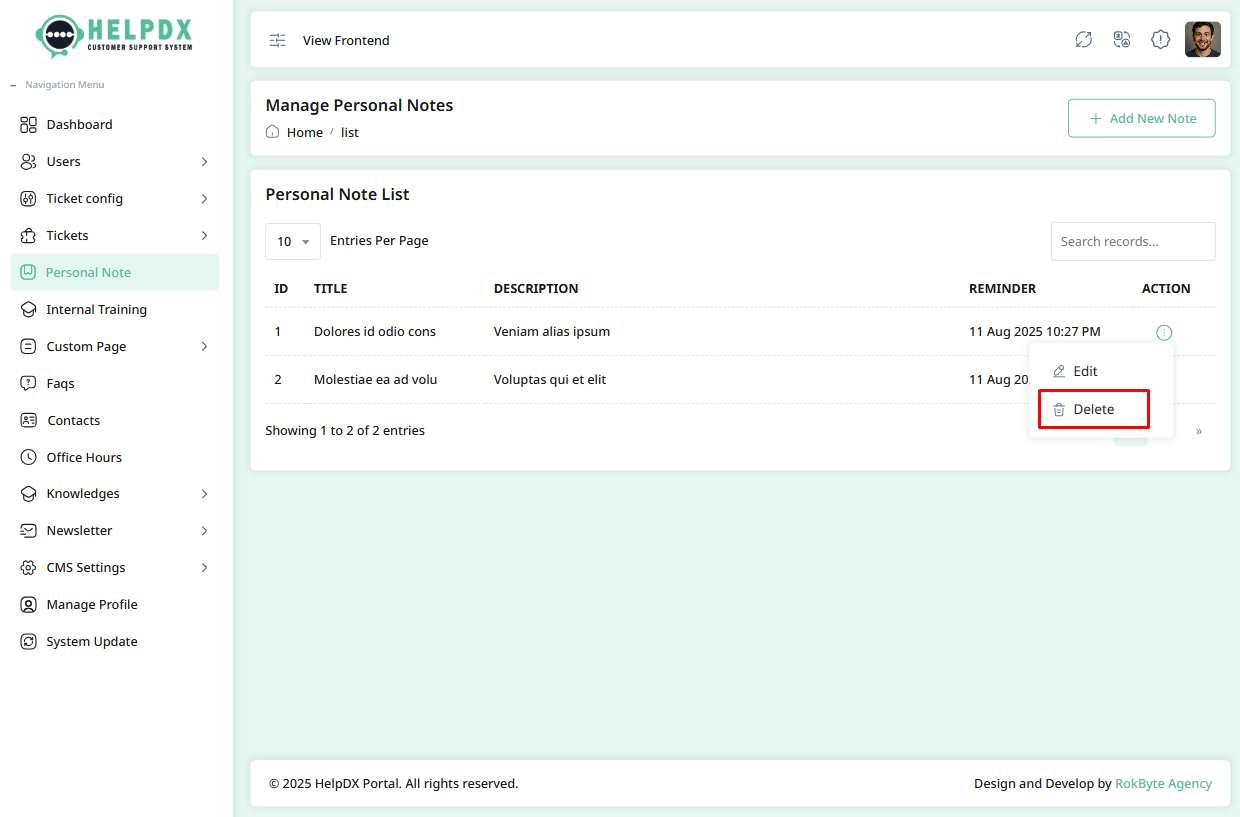
Manage Personal Note (Edit or Delete)
Once a Note is created, you can manage it from the Notes list:
- Click on the three-dot menu (⋮) beside the table row.
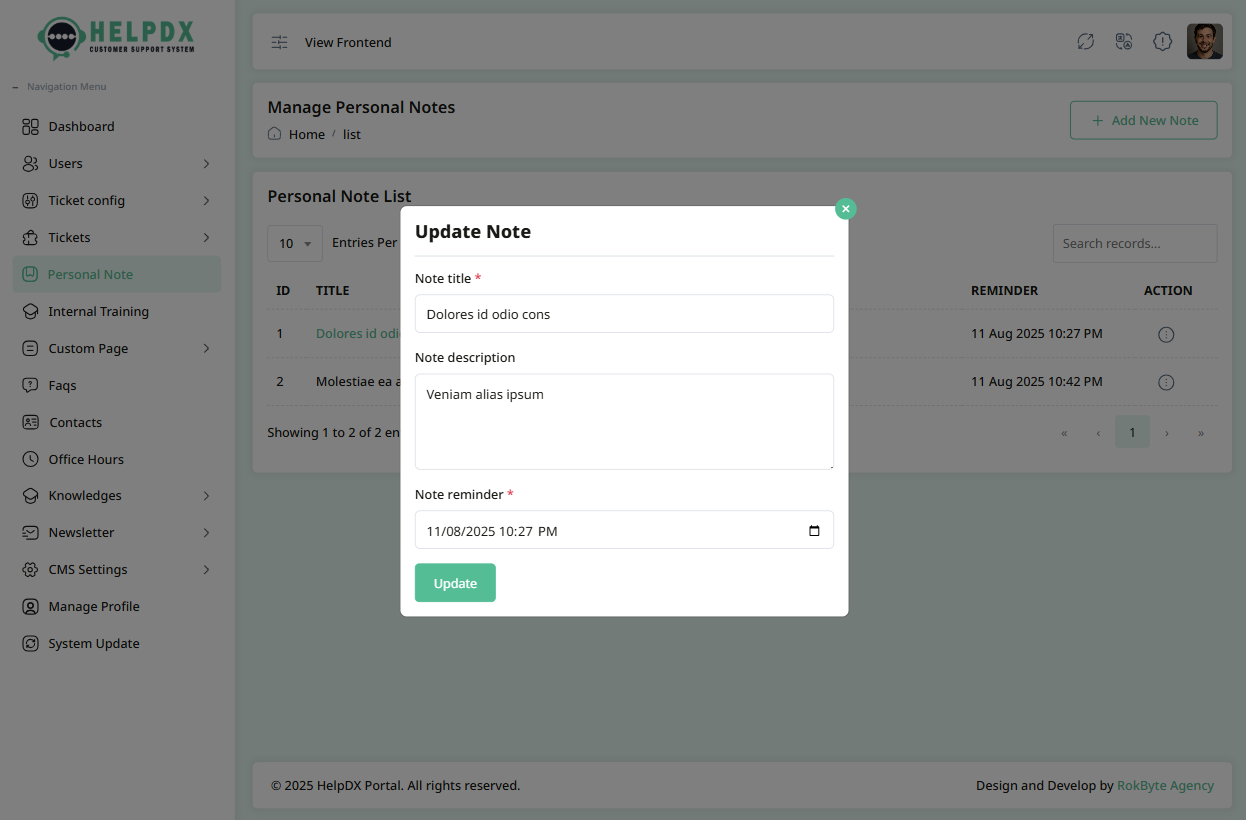
- Select Edit to update its information. A modal with the edit form will appear. Make the necessary changes and click Update.
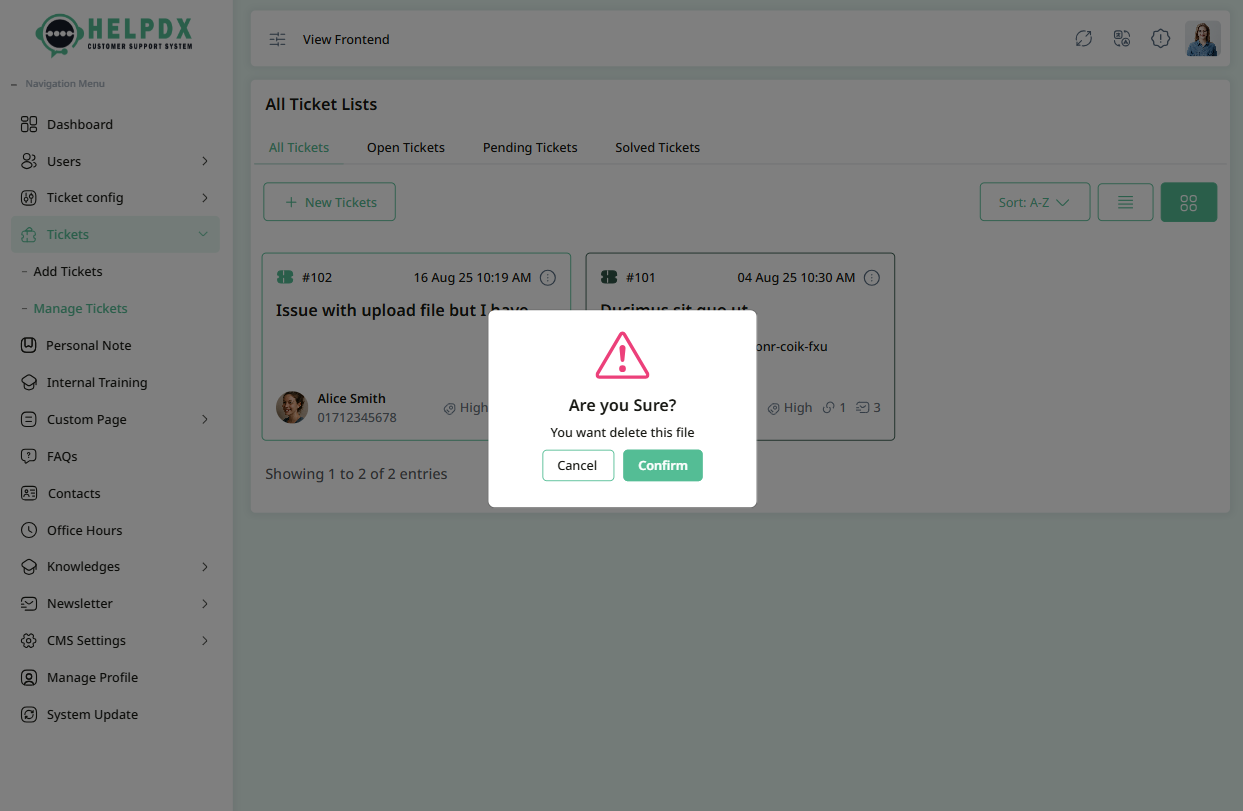
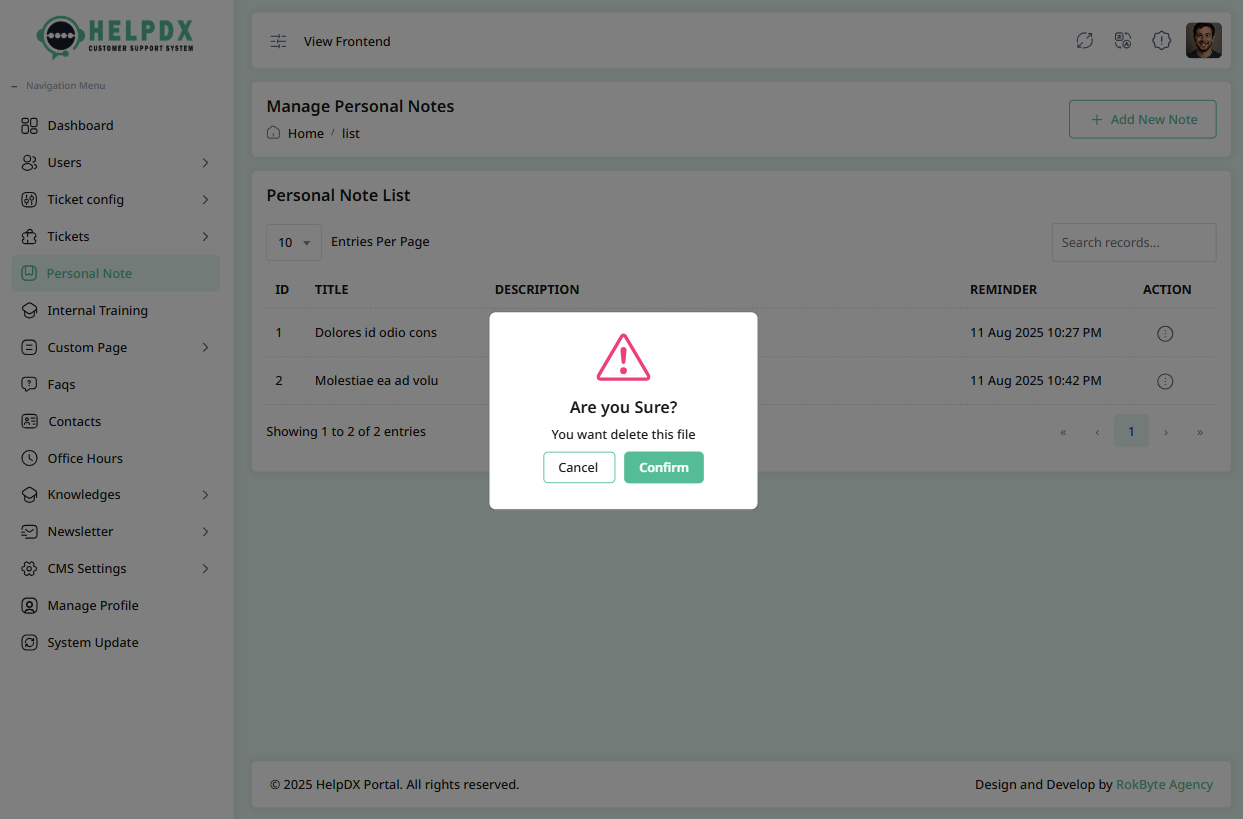
- Select Delete to remove the note. A confirmation box will appear. Confirm the action to delete the macro permanently.
Edit Note

Delete Note
Internal Training
In this section, we will cover:
1. Create Course
- Login to the Admin Panel.
- Navigate to Internal Training from the sidebar menu.
- Click the Add New Course button located at the top-right corner.
- A new modal form will appear. Fill in the required information for the course (such as Title, Video Type, Duration, and Course Status).
- You can select video type from dropdown
- Select the status as Active or Deactivated. If you select Active, this tag will appear during ticket creation.
- After completing the form, click the Save button to create the course.


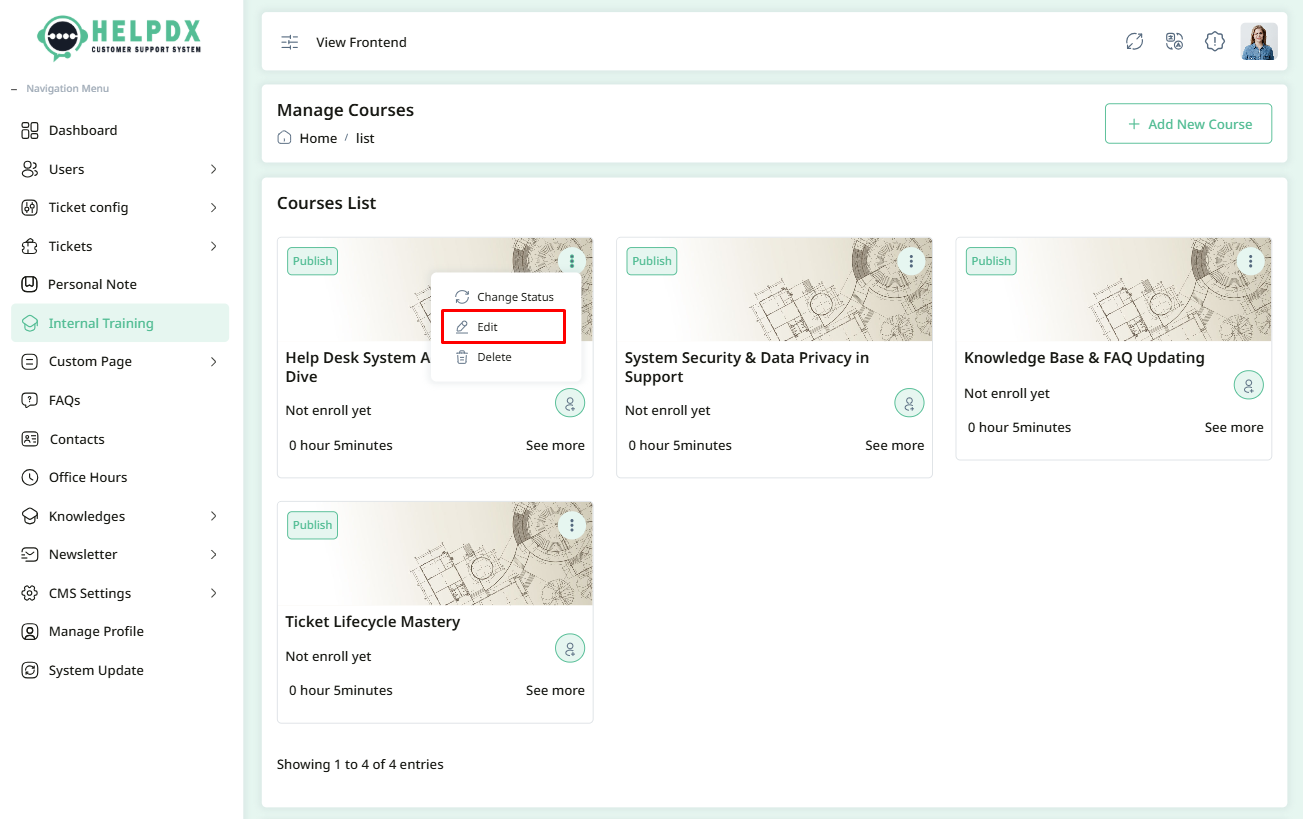
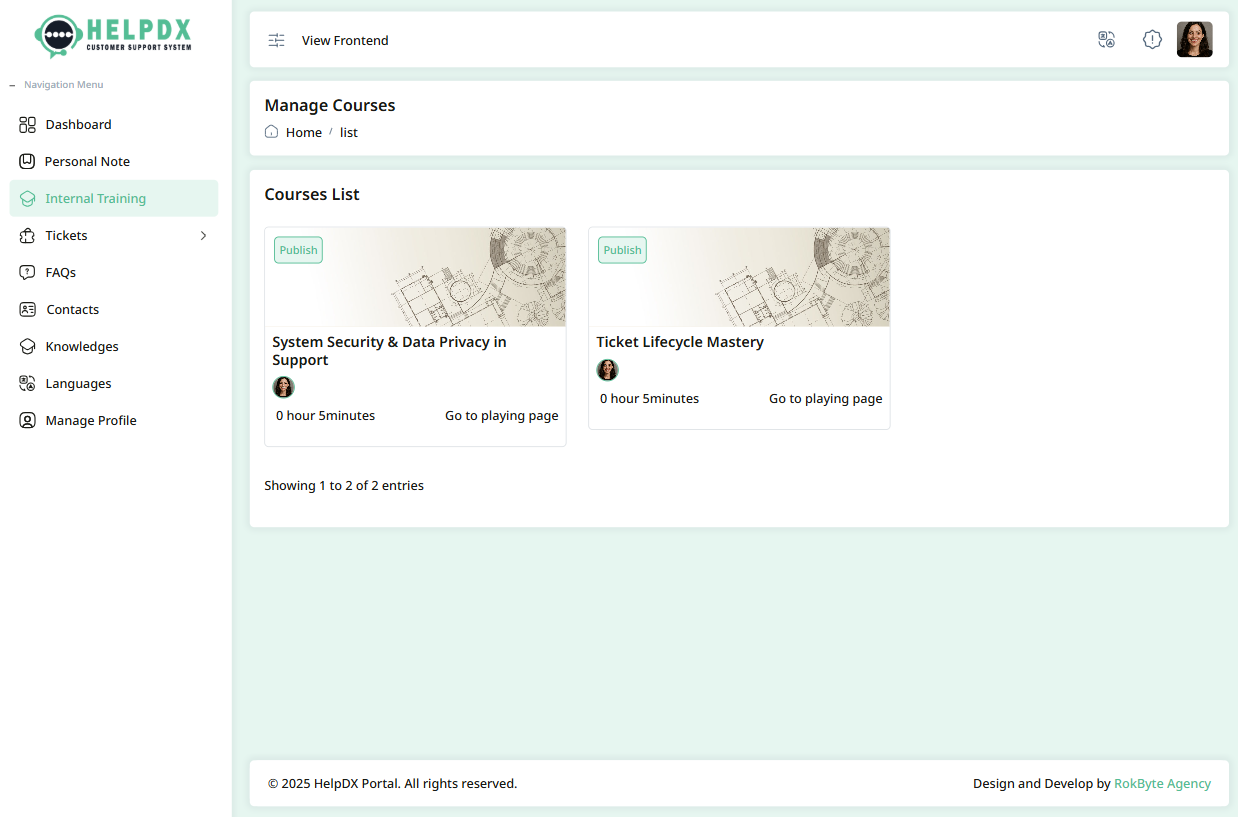
2. Manage Courses (Edit or Delete or Change Status)
Once a course is created, you can manage it from the Course List:
- Click on the three-dot menu (⋮) beside the course in the table.
- Select Edit to update the course information. A modal form will appear. Make the necessary changes and click Update.
- Select Delete to remove the course. A confirmation box will appear. Confirm the action to permanently delete the course.
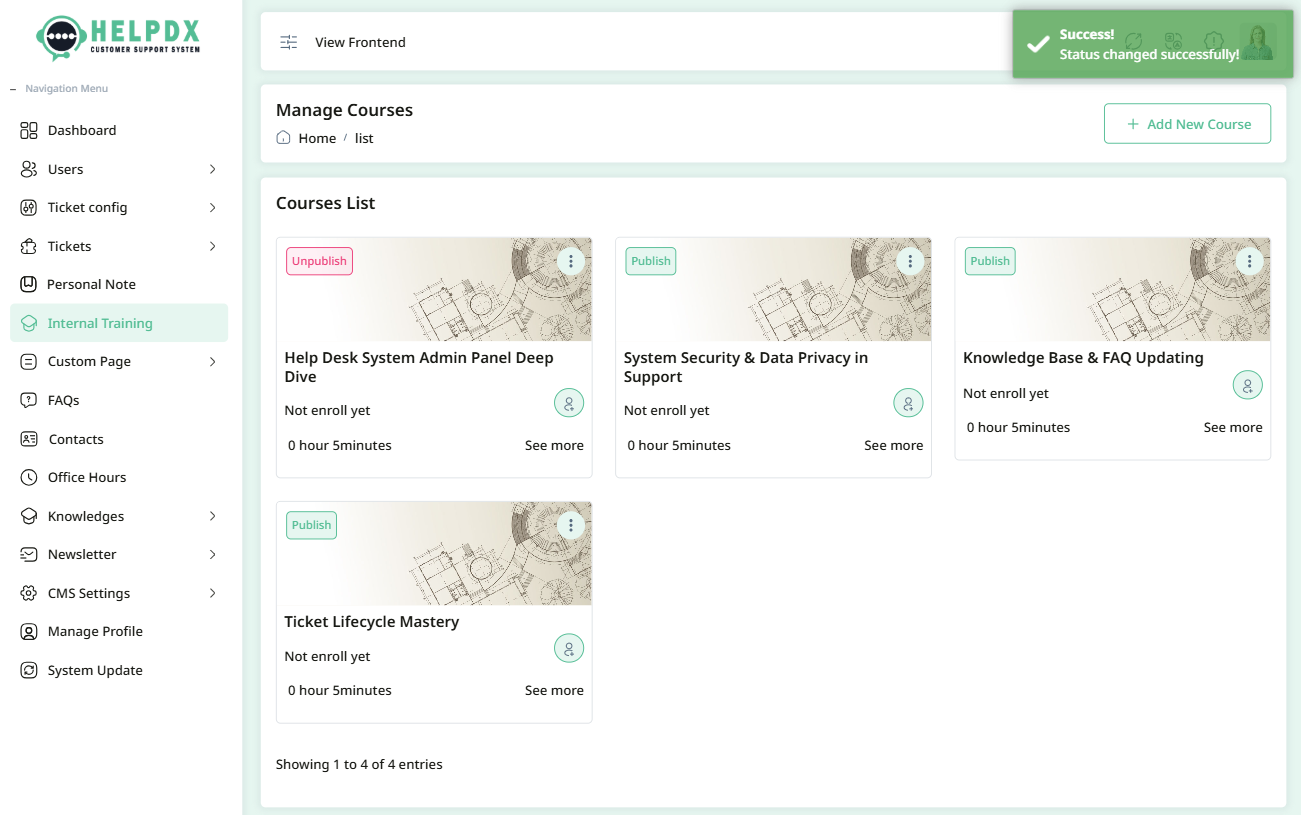
- Select Change Status to update the status. When you click the Change Status button, the status will be updated automatically between Active or De-Active..
Edit Course

Delete Course


Course status change

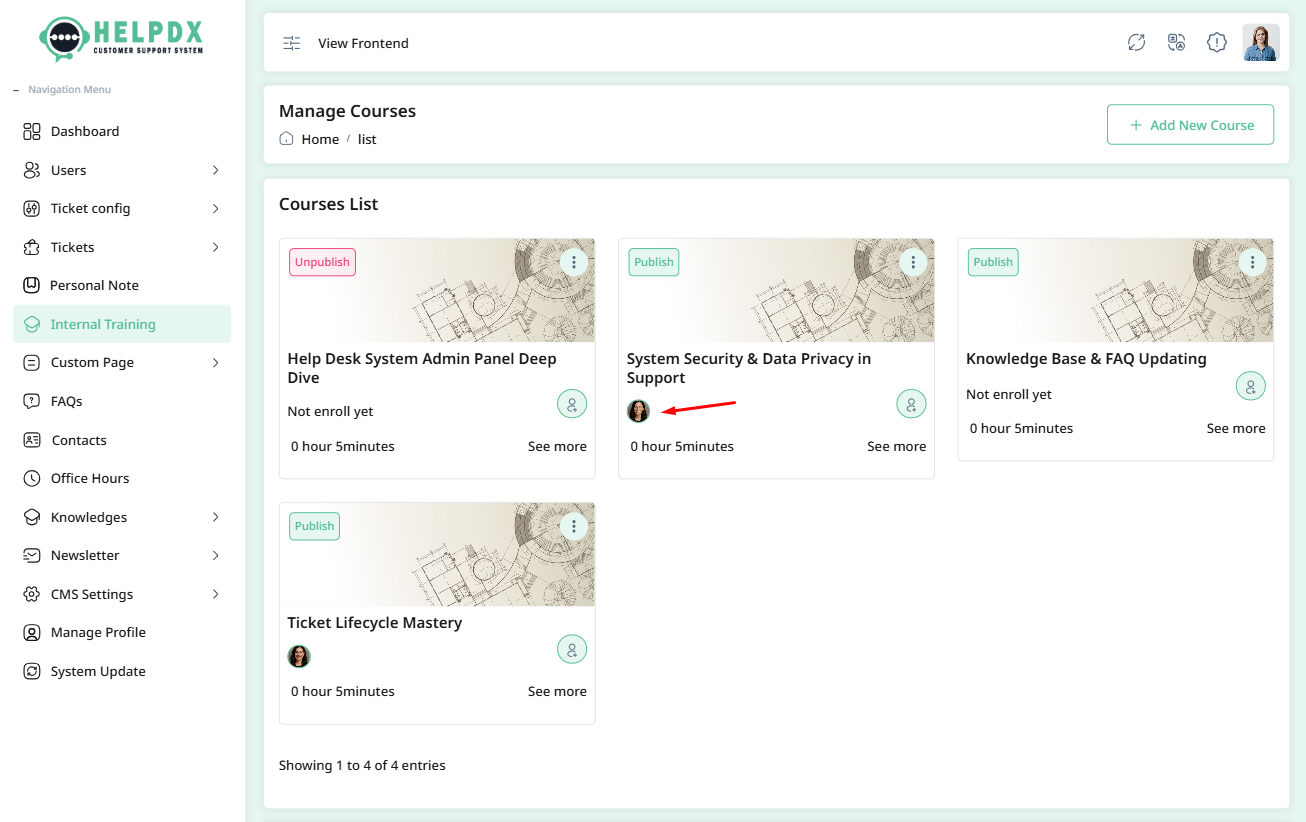
3. Enroll Co-Admins
Once a course is created, you can manage enrollments from the Course List:
- Click on the User Add button located on the course card.
- A modal will open with a dropdown. Select a Co-Admin from the dropdown and click Enroll.
- Once enrolled, you can also remove a Co-Admin if needed.
- To remove an enrollment, click on the user’s profile image. A confirmation box will appear — click Confirm to remove the enrollment.
Course Enrollment


Remove Course Enrollment

Custom Pages
The Custom Pages section allows you to create and manage static content pages for your Help Desk system. You can use it to add internal documentation, guides, policies, or any other content that needs to be accessible from within the system.
- Login to the Admin Panel.
- Navigate to Custom Pages from the sidebar menu.
- Click the Add New Page button located at the top-right corner.
- Alternatively, navigate directly to Add New Page from the sidebar menu.
- A new page will appear. Fill in the required information such as Title, Description, Page Name, etc.
- After completing the form, click the Save button to create the page.


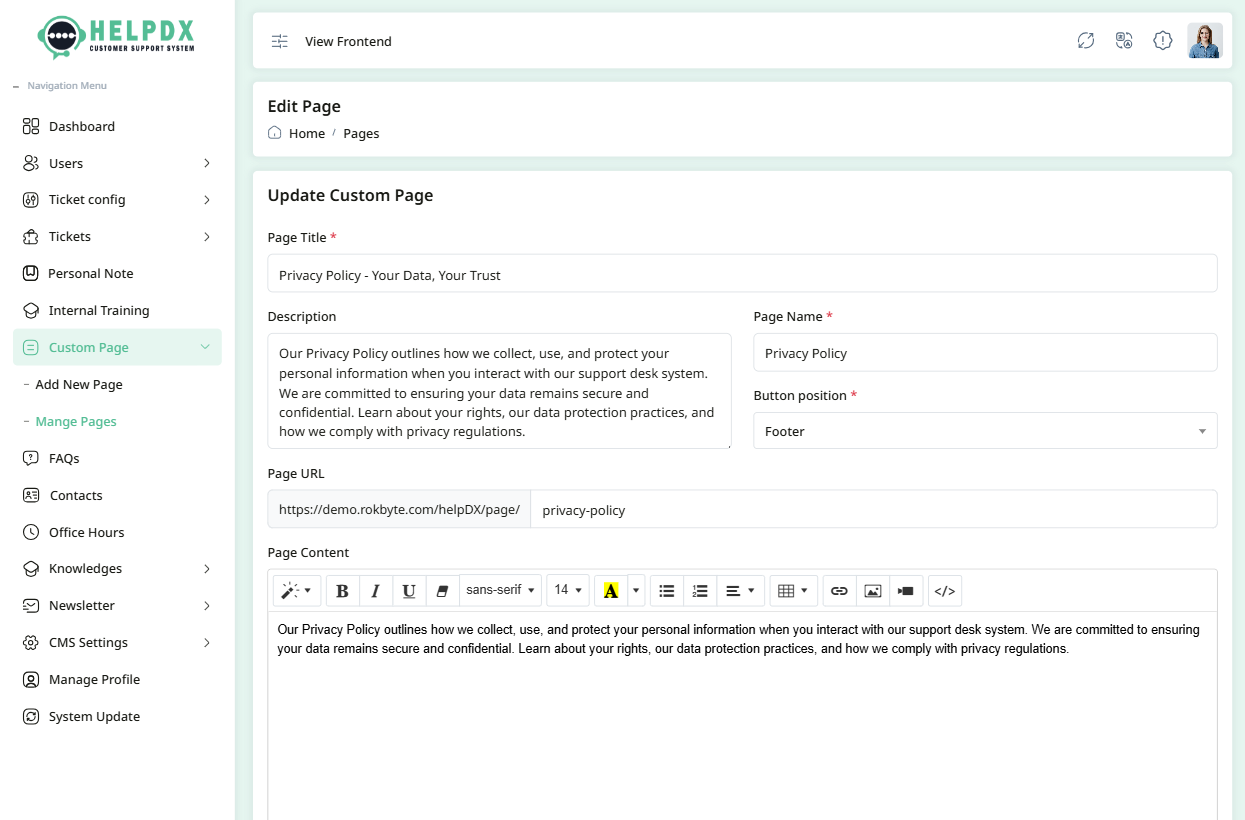
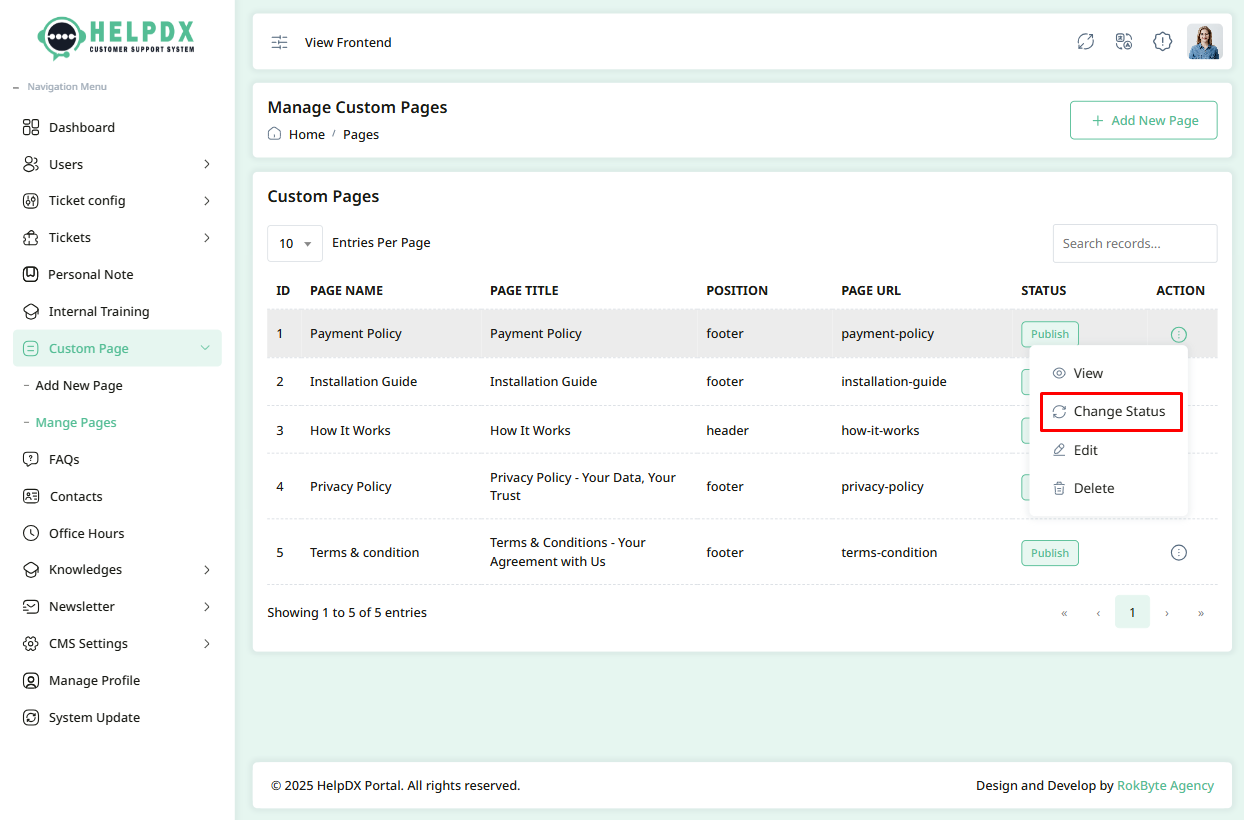
Manage Custom Pages (Edit, Delete, or Change Status)
Once a page is created, you can manage it from the Pages list:
- Click on the three-dot menu (⋮) beside the page entry.
- Select Edit to update its information. A form will appear — make the necessary changes and click Update.
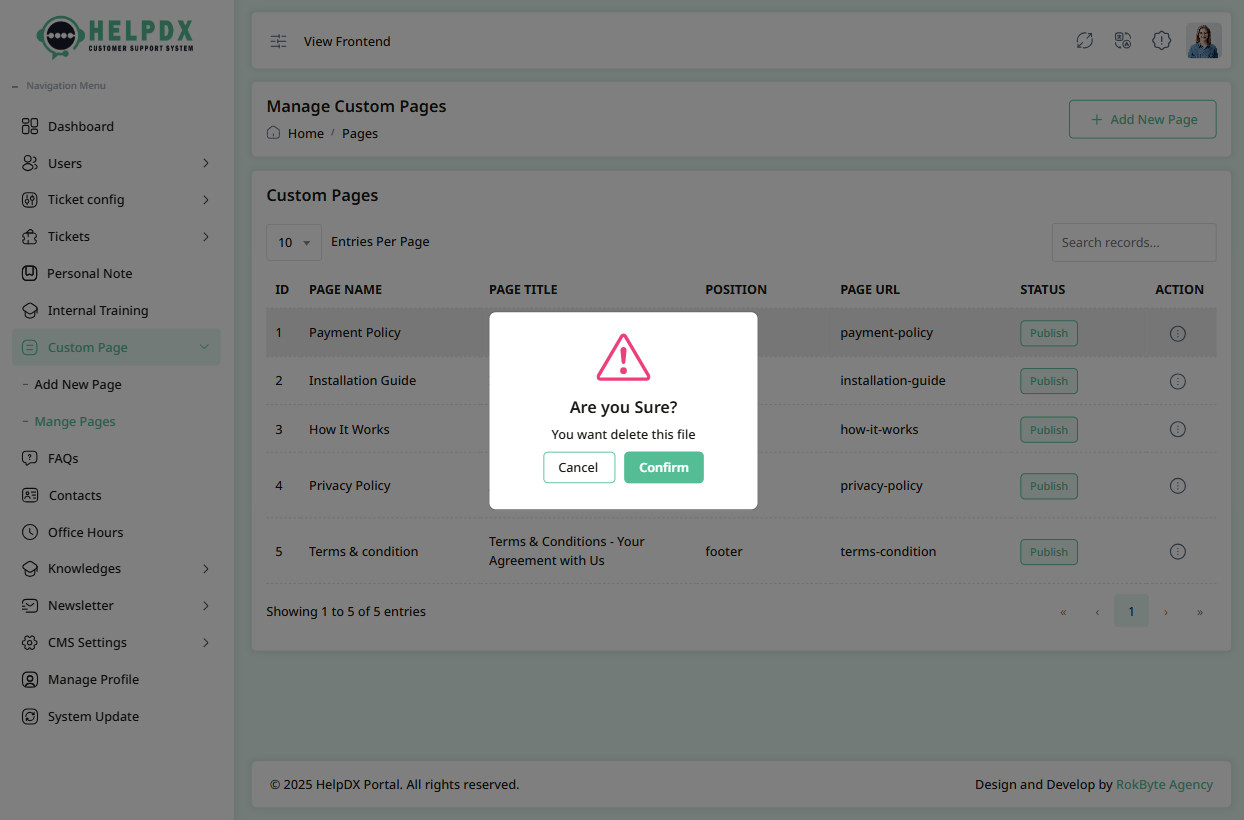
- Select Delete to remove the page. A confirmation popup will appear. Confirm the action to delete the page permanently.
- Select Change Status to toggle the page's status. When you click the Change Status button, the status will update automatically.
Edit Custom Page

Delete Custom Page

Change Custom Page Status

How to Create FAQs
The FAQ section allows you to add common questions and answers to help users find solutions quickly without needing to contact support. You can categorize FAQs, write clear answers, and make them publicly visible or private for internal use.
- Login to the Admin Panel.
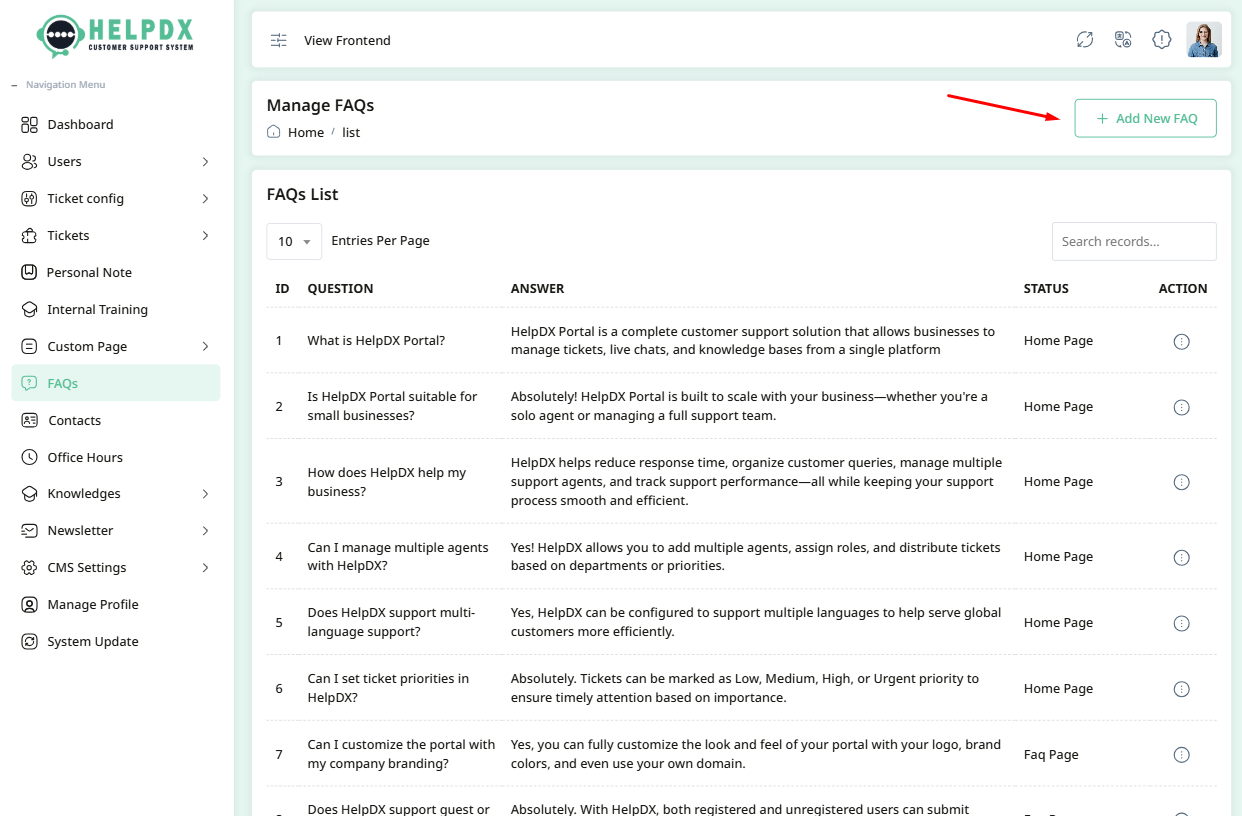
- Navigate to FAQs from the sidebar menu.
- Click on the Add New FAQ button at the top-right corner.
-
A form will appear. Fill in the following details:
- Title – the question.
- Select Status – select status from dropdown.
- Description – the answer or explanation.
- Select Icon - you can select file and preview image
- Click Save to publish the FAQ.

Manage FAQs (Edit, Delete, or Change Status)
You can manage your existing FAQs from the FAQ list:
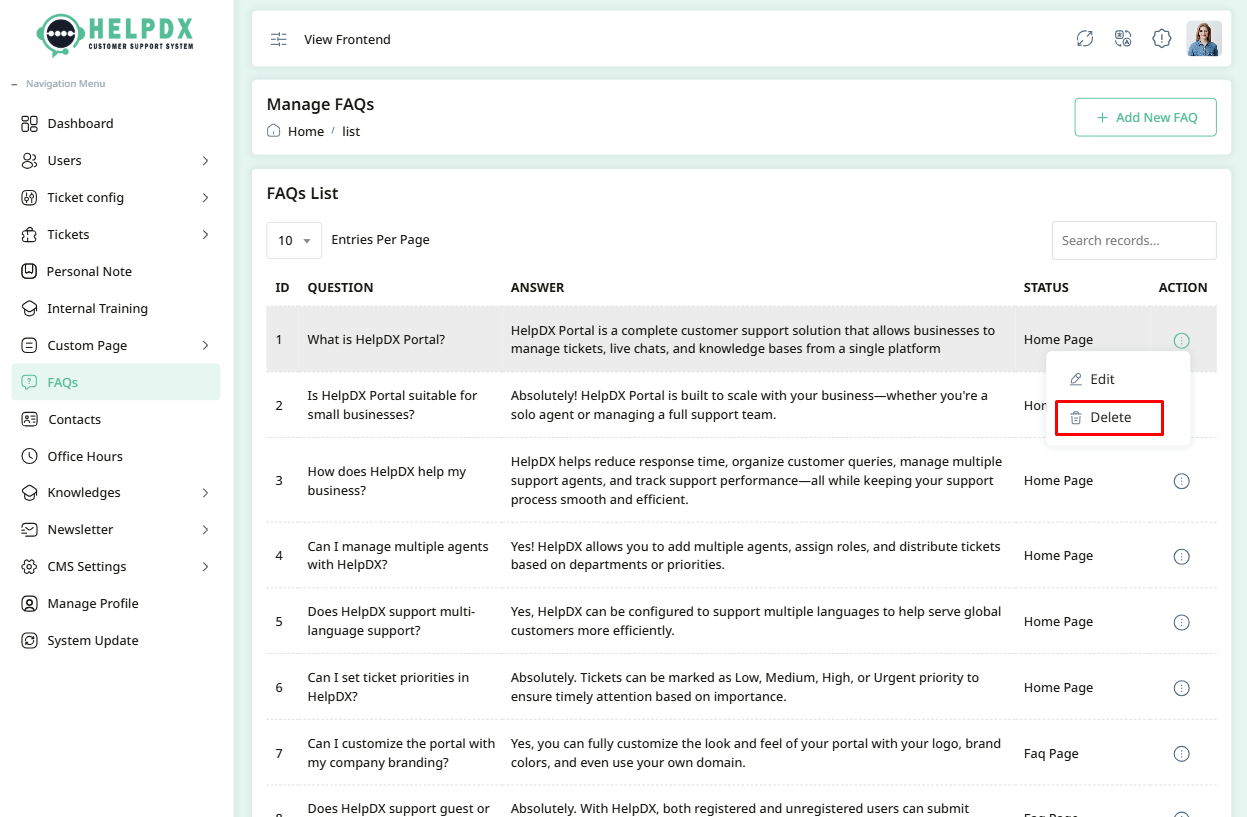
- Click on the three-dot menu (⋮) beside the FAQ entry.
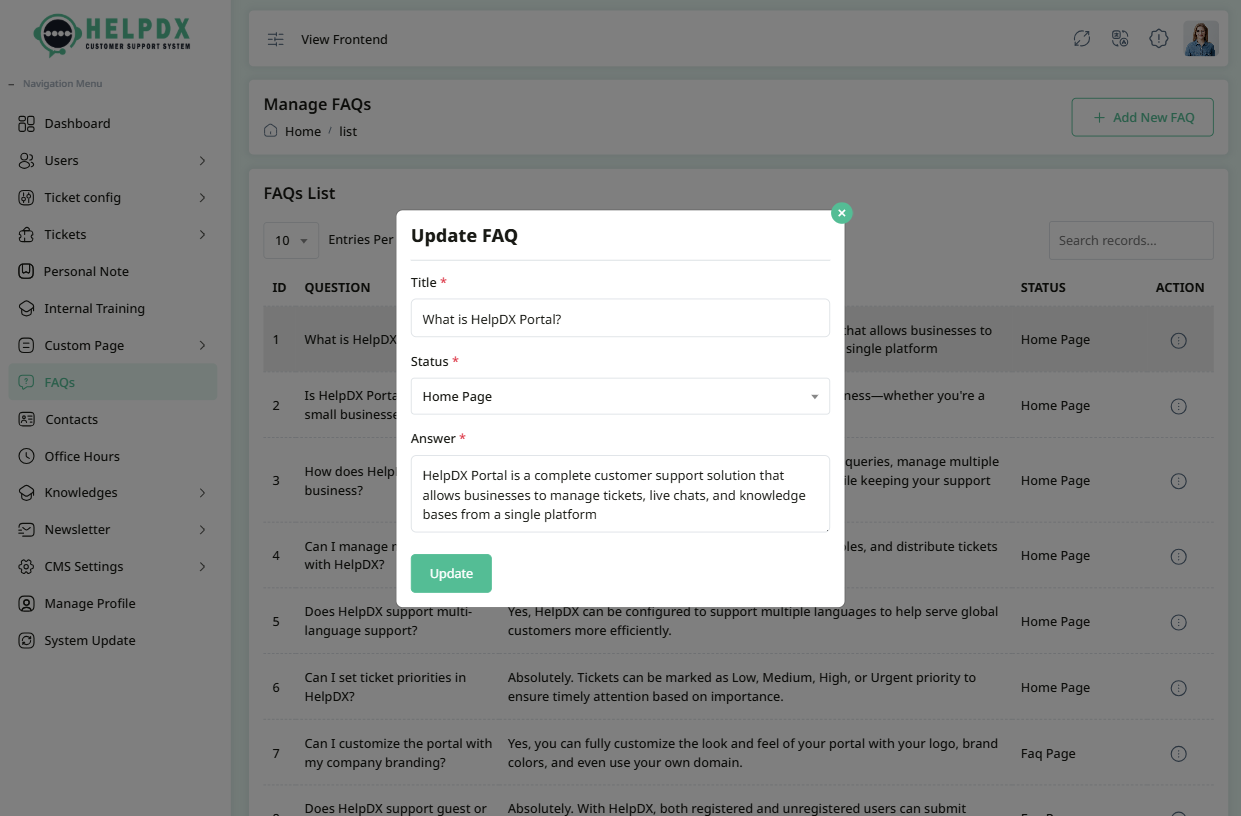
- Select Edit to update the question or answer, then click Update.
- Select Delete to permanently remove an FAQ after confirmation.
- Select Change Status to Home Page or FAQs Page or Hidden the FAQ as needed.
Edit FAQs

Delete FAQs

Knowledge Base
The Knowledge Base module helps organize helpful articles and resources for users. It is divided into two parts:
1. Knowledge Categories
Categories are used to group similar articles together, making it easier for users to browse and find information.
- Log in to the Admin Panel.
- Navigate to Knowledge > Category from the sidebar menu.
- Click the Add New Category button at the top-right corner.
- Fill in the category name and description in the modal form.
- Click Save to create the category.


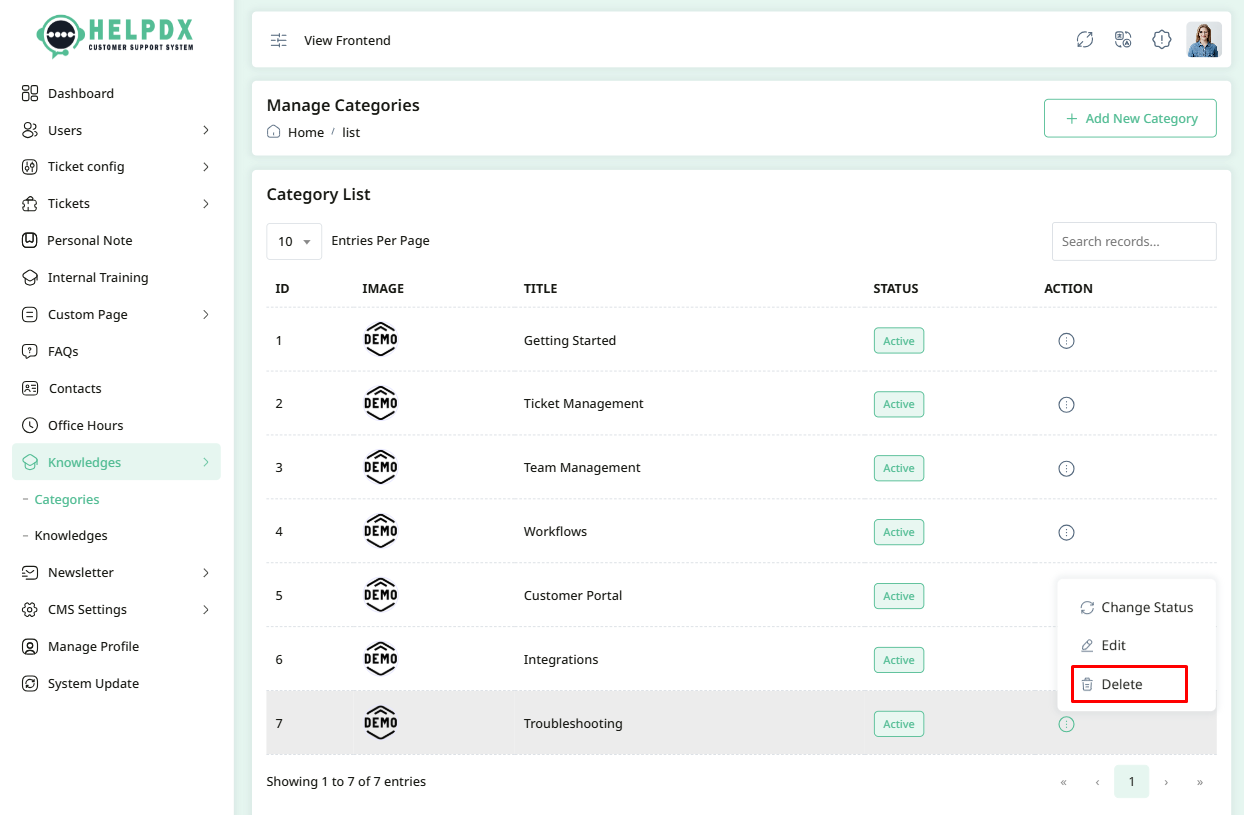
Manage Categories (Edit, Delete, or Change Status)
You can manage categories using the edit, delete, or status change options from the category list.
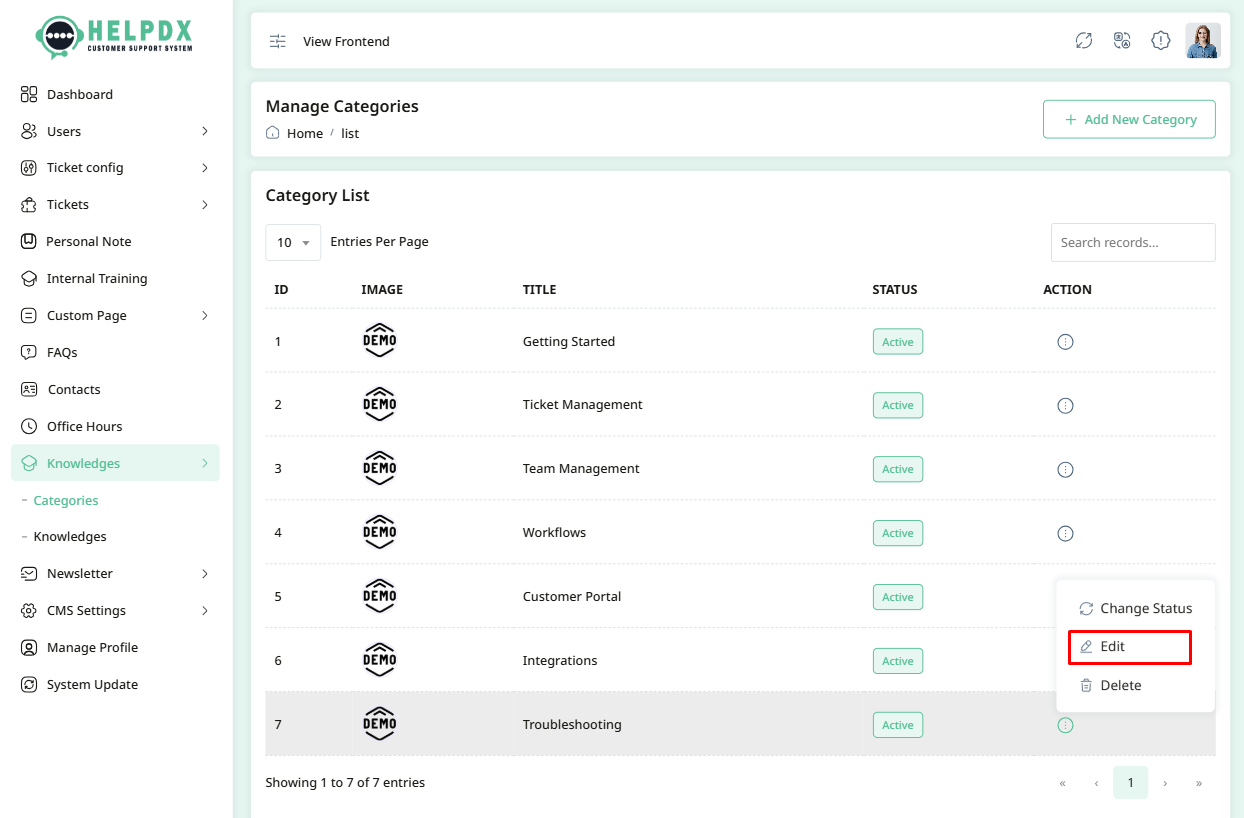
- Click on the three-dot menu (⋮) beside the category in the table.
- Select Edit to update the category information. A modal form will appear. Make the necessary changes and click Update.
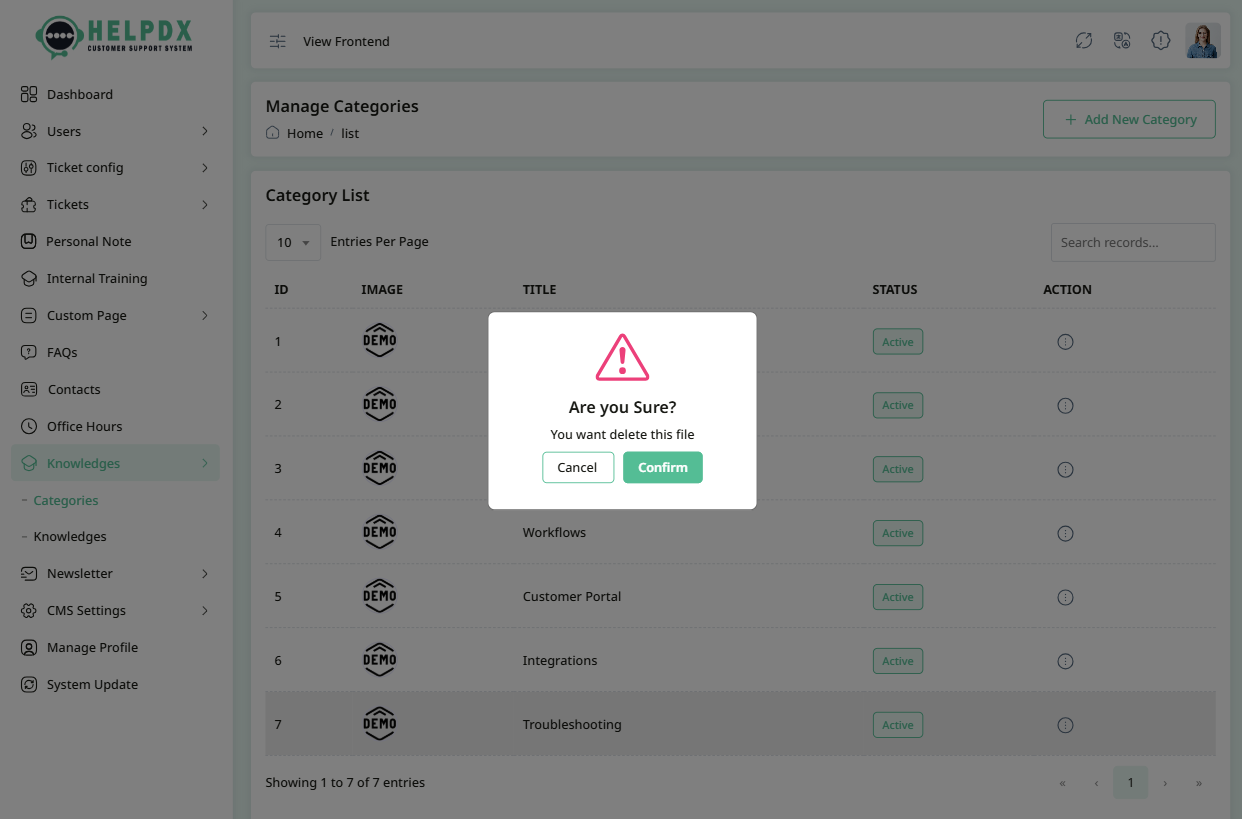
- Select Delete to remove the category. A confirmation box will appear. Confirm the action to delete the category permanently.
- Select Change Status to toggle the category between Active and Inactive.
Edit Category

Delete Category
Change Category Status


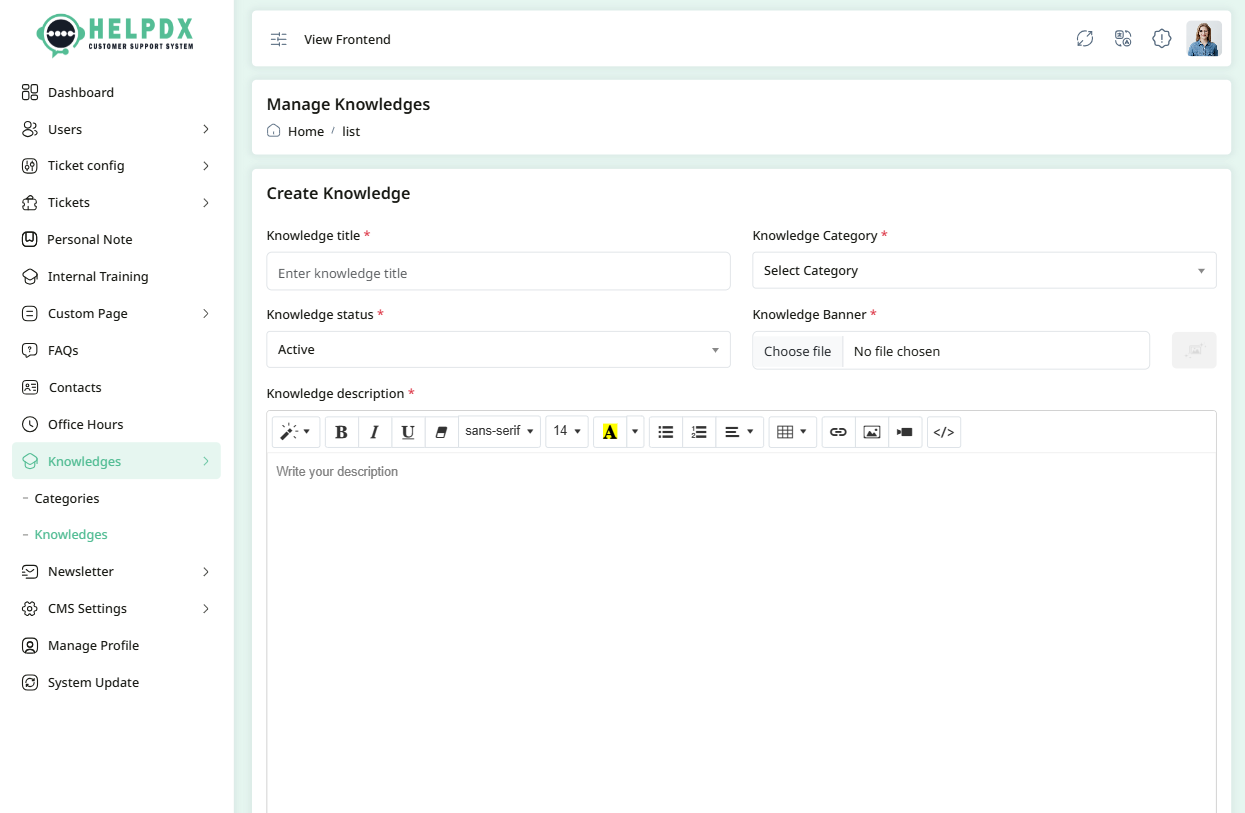
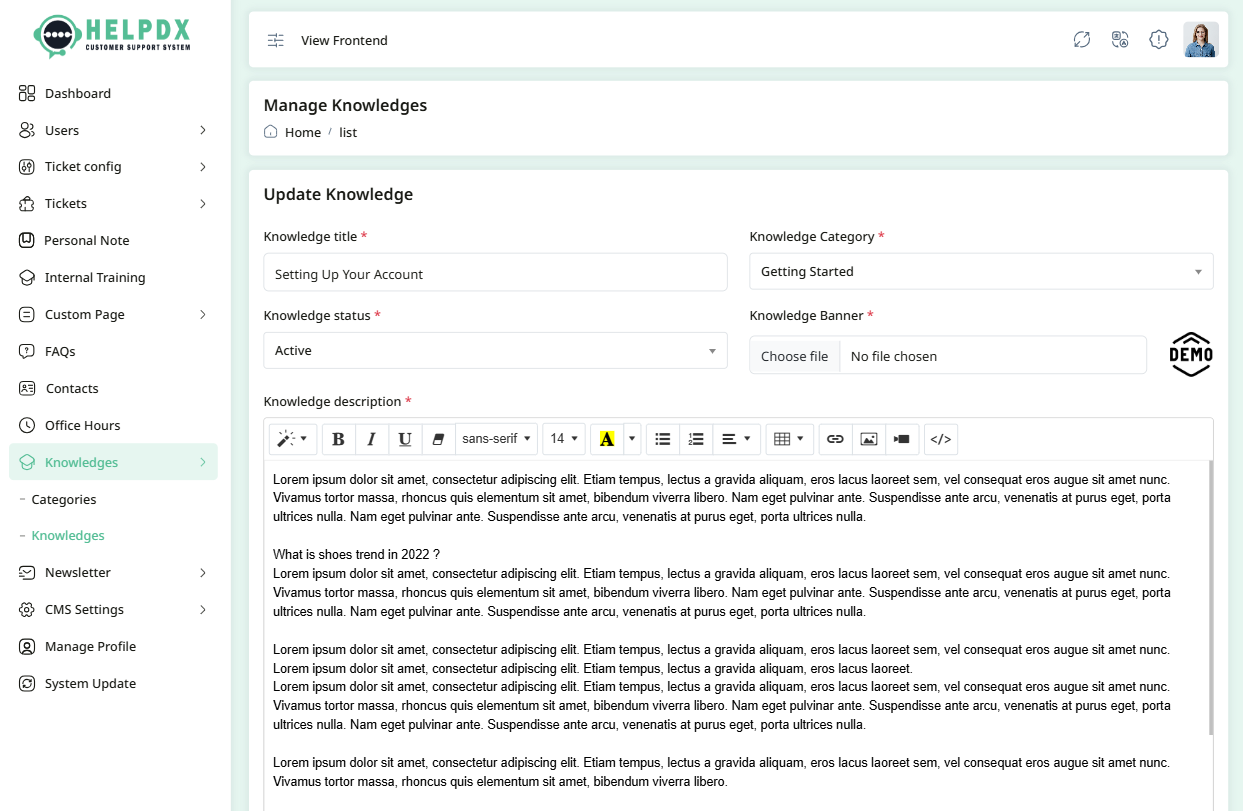
2. Knowledge Base Articles
Articles contain the actual content users can read to get help or understand features of the system.
- Log in to the Admin Panel.
- Navigate to Knowledge > Knowledges from the sidebar menu.
- Click the Add New Knowledge button at the top-right corner.
- A new page will appear. Fill in the required details like Title, Category, Description, Status, etc.
- Click Save to publish the article.

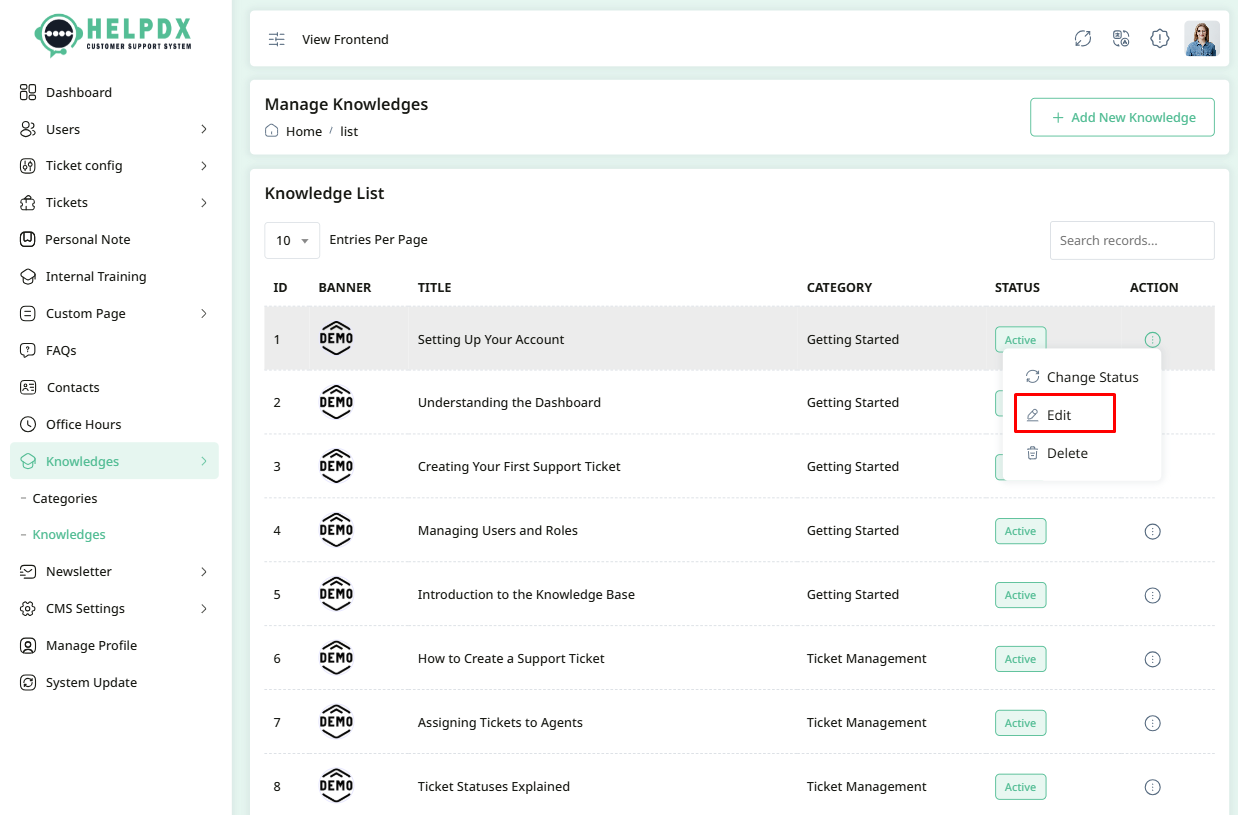
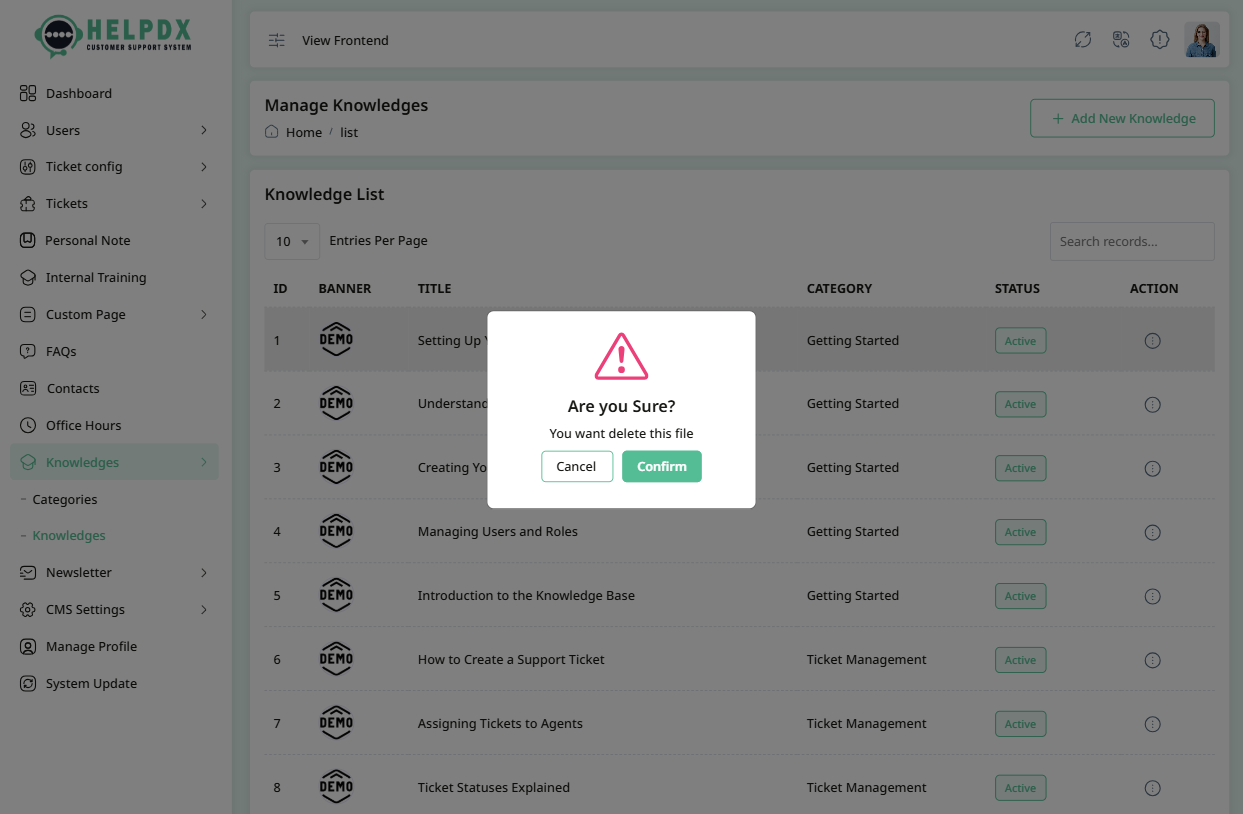
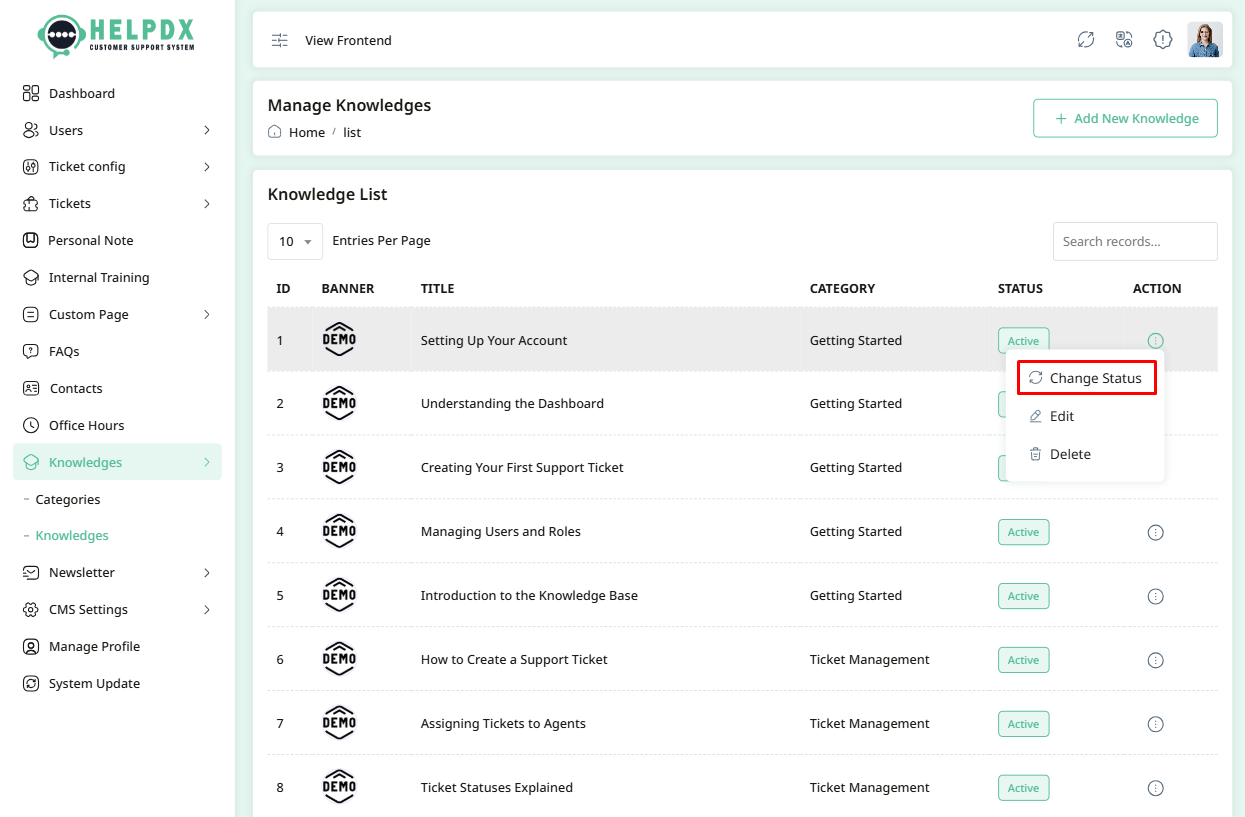
Manage Knowledge Articles (Edit, Delete, or Change Status)
You can manage articles using the edit, delete, or status change options from the knowledge list.
- Click on the three-dot menu (⋮) beside the article in the table.
- Select Edit to update the article. A page will appear. Make the necessary changes and click Update.
- Select Delete to remove the article. A confirmation box will appear. Confirm the action to delete the article permanently.
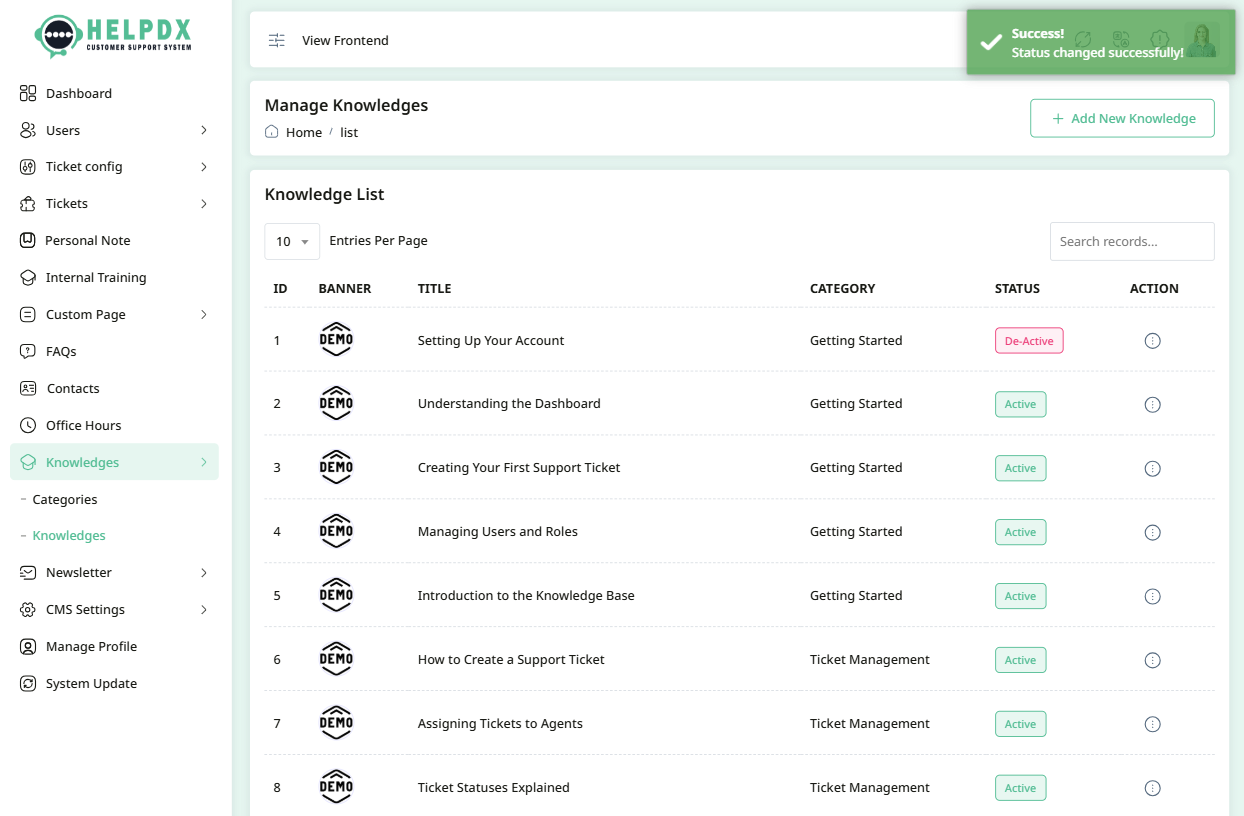
- Select Change Status to toggle the article between Active and Inactive.
Edit Knowledge Article
Delete Knowledge Article

Change Knowledge Article Status
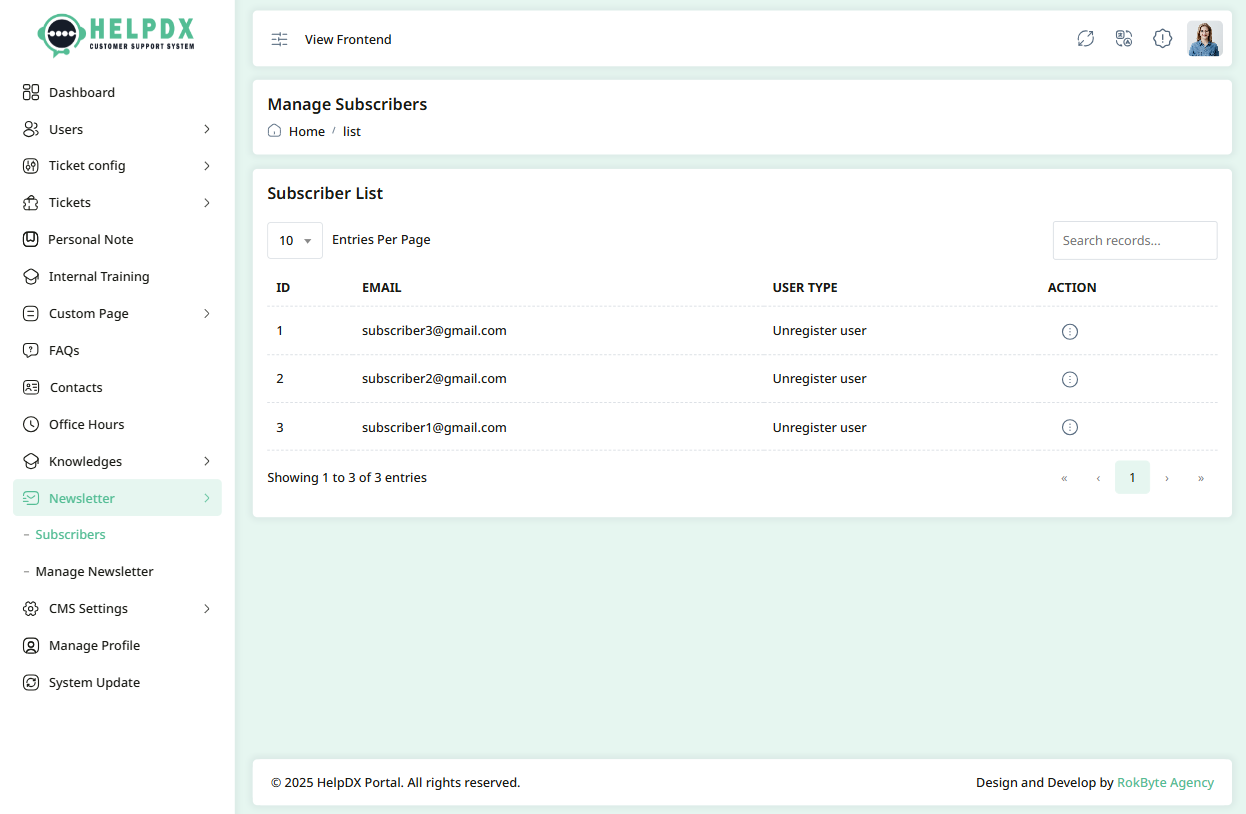
Subscribers
The Subscribers section allows you to send emails to users who have subscribed. You can send predefined newsletters or create custom ones.
- Log in to the Admin Panel.
- Navigate to Newsletter > Subscriber from the sidebar menu.
- The subscriber list is populated with users who have subscribed using their email addresses on the frontend.
- Note: Make sure SMTP credentials are valid and setup correctly
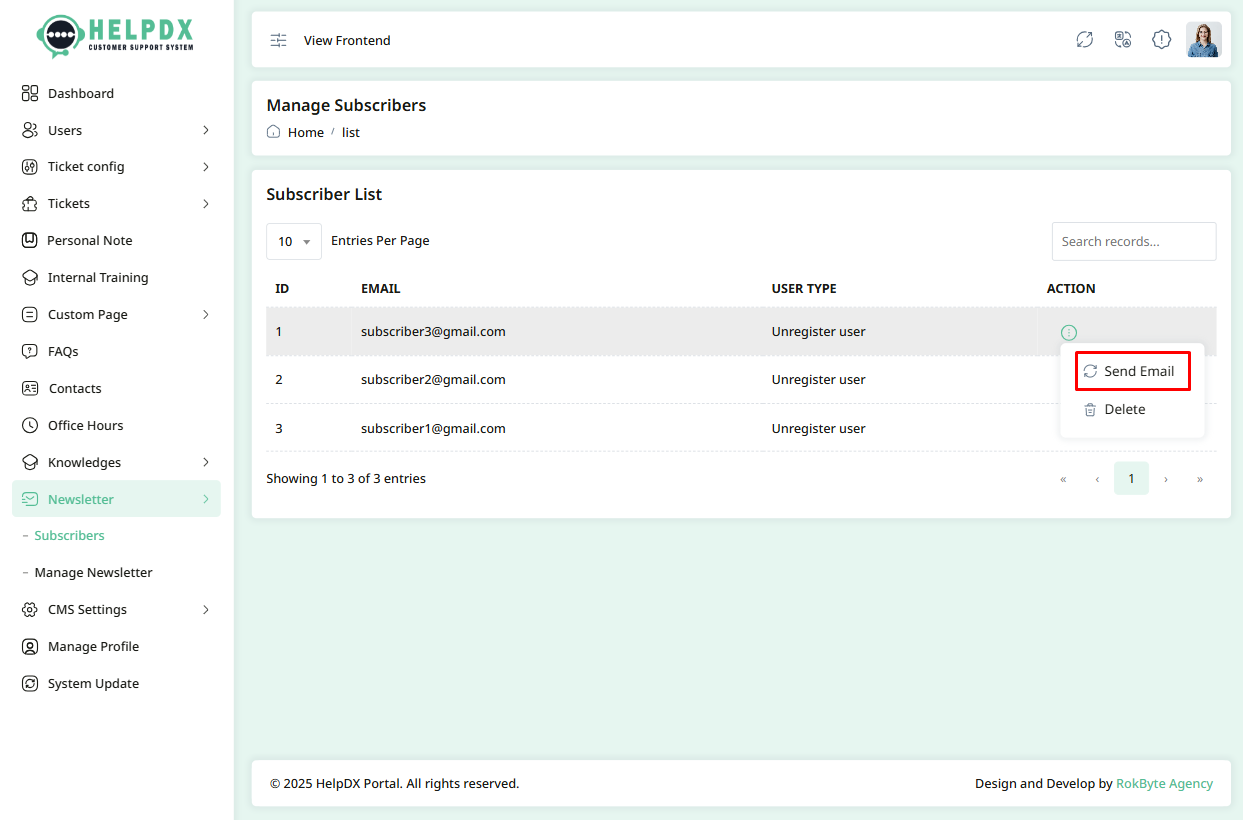
Manage Subscribers (Delete or Send Email)
You can manage subscribers using the delete or send email options from the subscriber list.
- Click on the three-dot menu (⋮) beside the subscriber in the table.
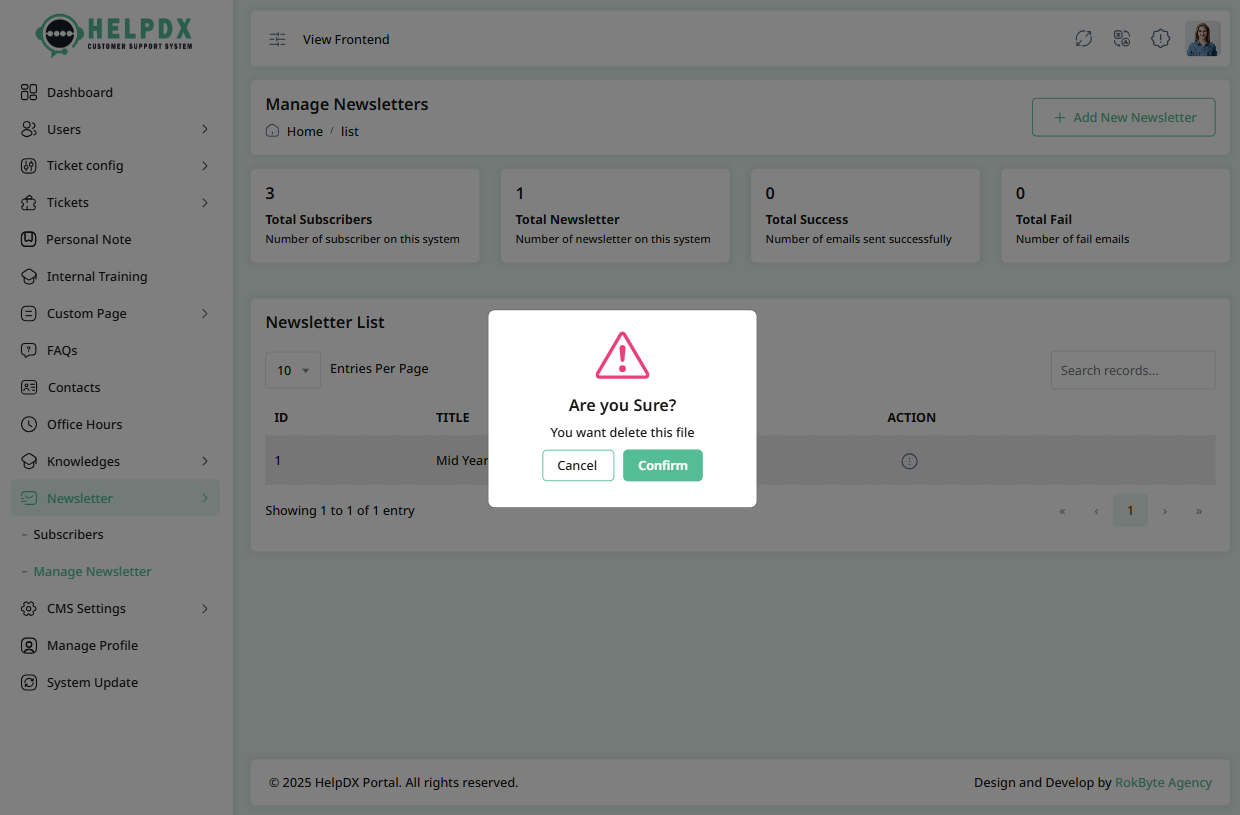
- Select Delete to remove the subscriber. A confirmation box will appear—confirm the action to permanently delete the subscriber.
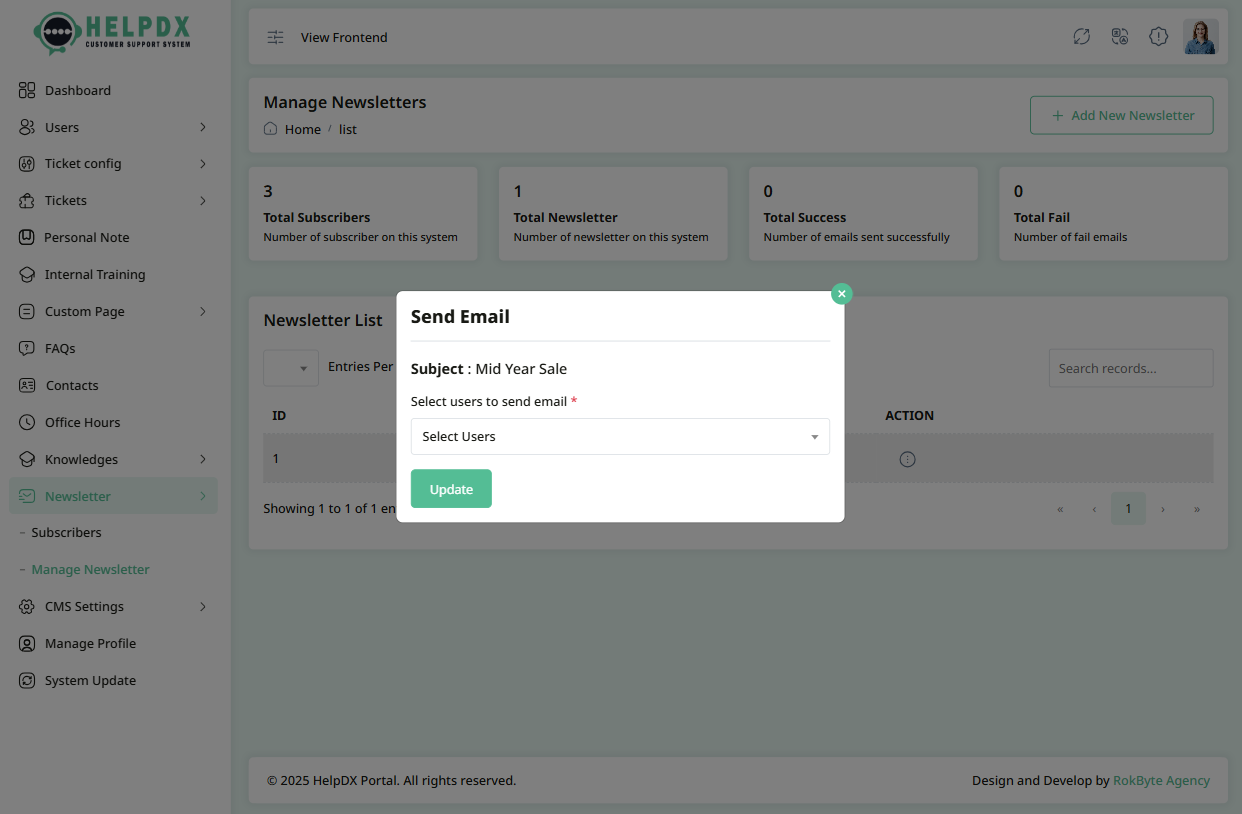
- Select Send Email to send a newsletter to the subscriber.
- After clicking Send Email, a modal will appear. You can choose from predefined newsletters or write a custom message. Then, click the Send button.
Delete Subscriber


Send Email


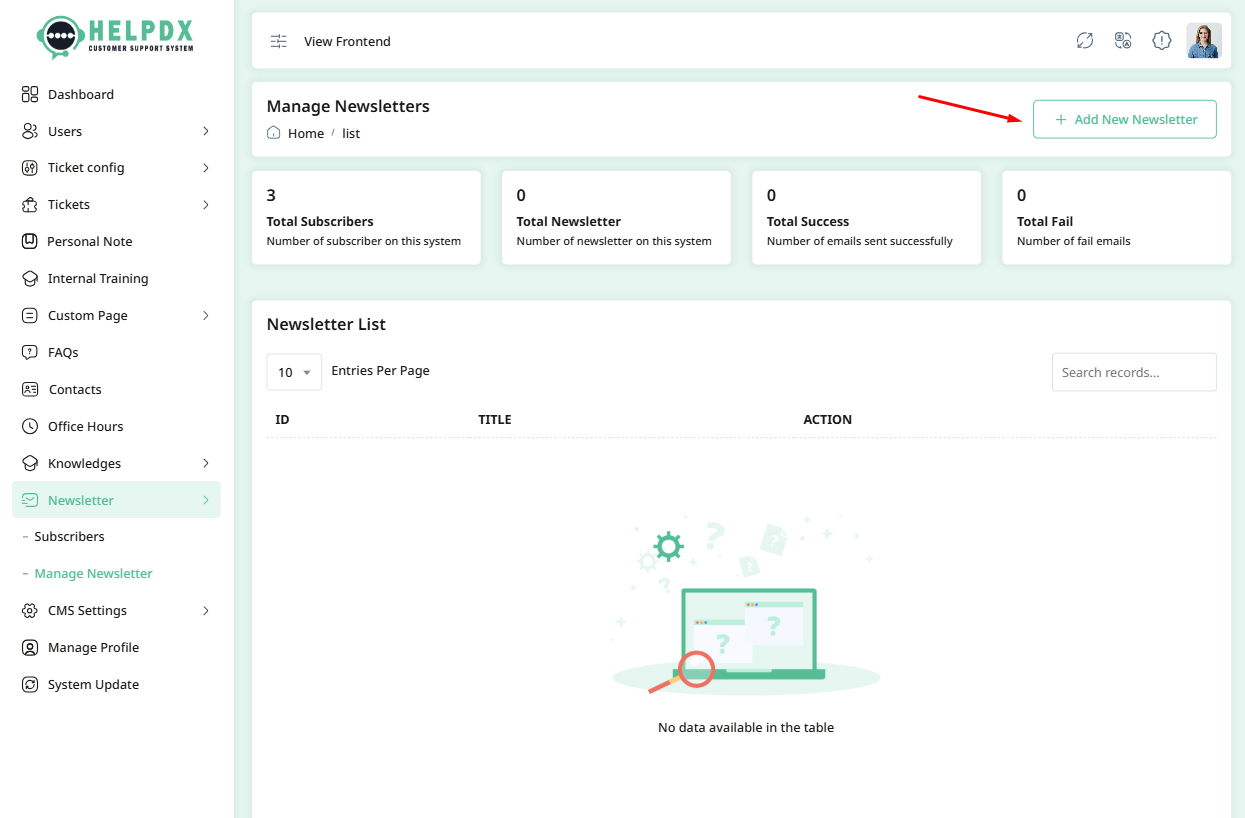
Newsletter
The Newsletter section allows you to create and send newsletters to both registered and unregistered users.
- Log in to the Admin Panel.
- Navigate to Newsletter > Newsletter from the sidebar menu.
- Click the Add New Newsletter button at the top-right corner.
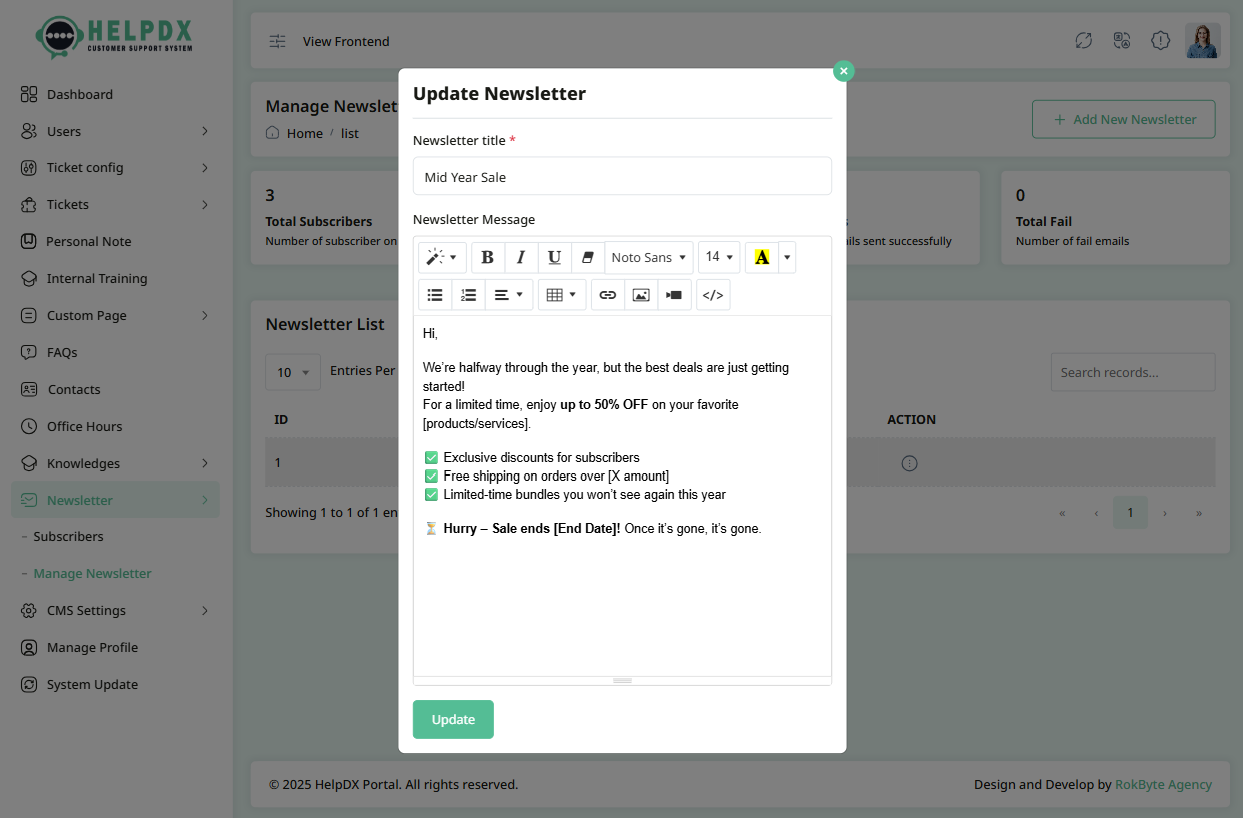
- A modal form will appear. Fill in the required information, such as the Title and Message of the newsletter.
- After completing the form, click the Save button to create the newsletter.

Manage Newsletters (Edit, Delete, or Send Email)
You can manage newsletters using the Edit, Delete, or Send Email options in the newsletter list.
- Click the three-dot menu (⋮) beside the newsletter in the table.
- Select Delete to remove the newsletter. A confirmation box will appear—confirm the action to delete it permanently.
- Select Edit to update the title or content, then click Update.
- Select Send Email to send the newsletter to subscribers.
- After clicking Send Email, a modal will appear. Choose the user type (registered or unregistered), then click the Send button.
Edit Newsletter

Delete Newsletter

Send Email

CMS Settings
The CMS Settings section allows you to configure core aspects of your website. It includes options to update general information, site branding, language preferences, SMTP credentials, social login settings, email templates, and SEO configurations. Properly setting up these options ensures smooth website functionality, better communication with users, and improved search engine visibility.
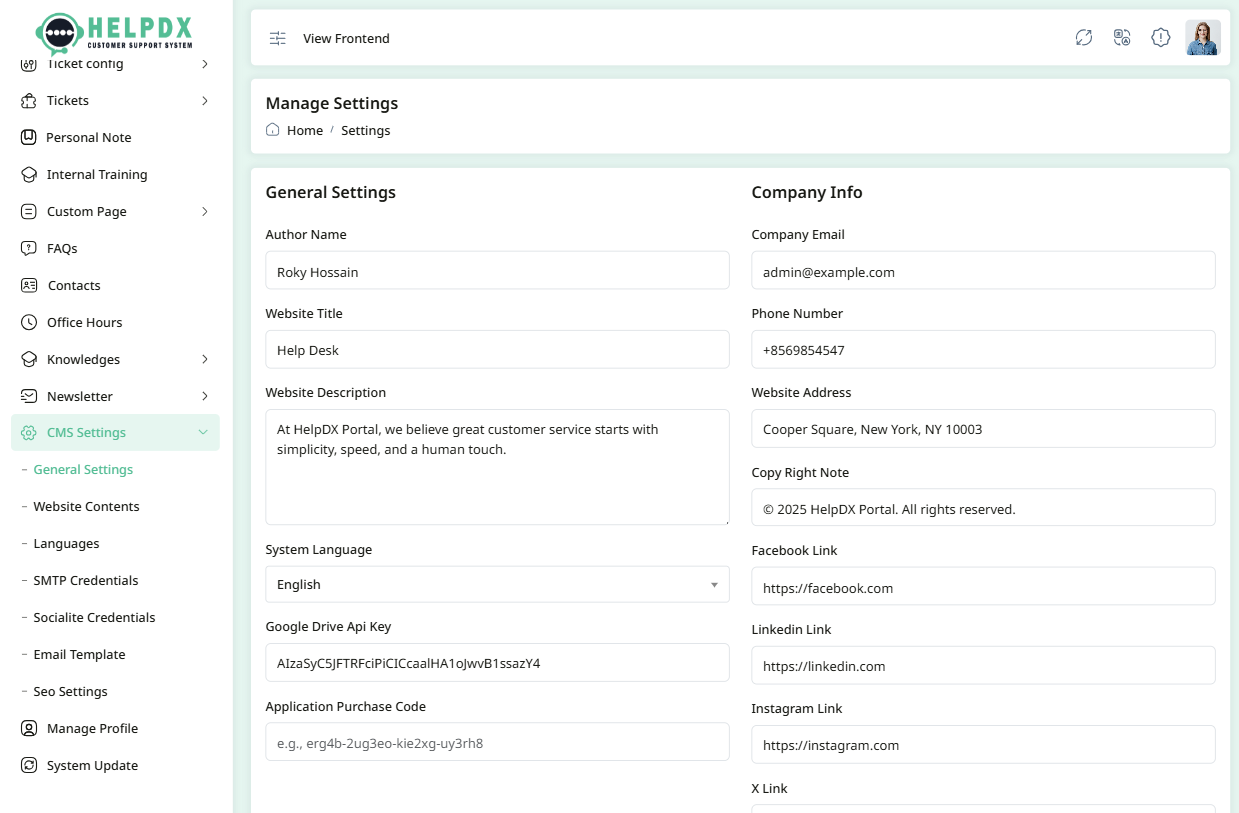
1. General Settings
The General Settings section allows you to configure essential details about your website. You can update the following:
- Website Title – The name of your site displayed in the browser title bar and various system areas.
- Description – A short description or tagline for your website.
- Address – Your business or organization address.
- Intro Video URL – A YouTube or Vimeo video link to showcase your platform to visitors.
- System Language – Set the default language for your application interface.
- Google Drive API Key – Enables playing Google Drive-hosted videos on your site.
- Application Purchase Code – (Optional) Enter your license or purchase code if applicable.
- Email Address – Used for system notifications and contact purposes.
- Copyright Note – Text that appears in the footer to indicate content ownership.
- Social Links – Add links to your Facebook, Twitter, LinkedIn, etc., for better user engagement.
These settings impact how your website looks and behaves across pages, browser tabs, emails, and the frontend.
2. Website Settings
The Website Settings section allows you to configure content and layout for your frontend pages. These settings let you control how your site looks and what users see when they visit. You can update the following:
- Home Page Content – Add or update banners, headlines, call-to-action buttons, and featured sections.
- Logos and Images – Upload your site's main logo, favicon, and other visual branding assets used across the site.
- About/Contact Page – Customize your About Us and Contact pages with relevant text, images, and location details.
- Services – Define and list the services your platform or business provides. Each service may include a title, description, and icon/image.
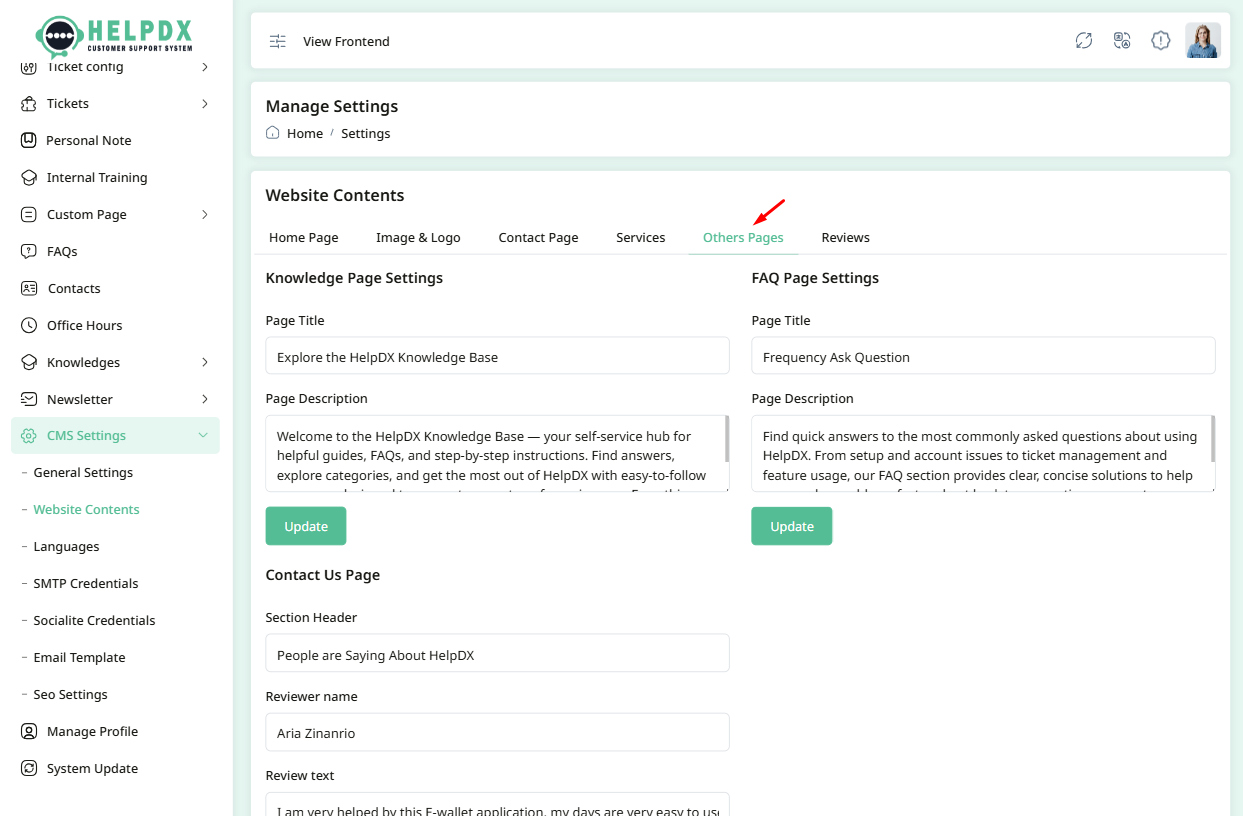
- Others – Define and list the other aspects your platform or business provides. Each aspect may include a title, description, and icon/image.
- Reviews/Testimonial Section – Showcase feedback or testimonials from users or customers with photos, names, and review text.
These settings allow you to personalize the entire user interface without touching any code. Each tab in this section corresponds to a different area of the frontend (e.g., Home, Services, Contact, etc.). The example image below shows the layout of this settings page:
Home Page
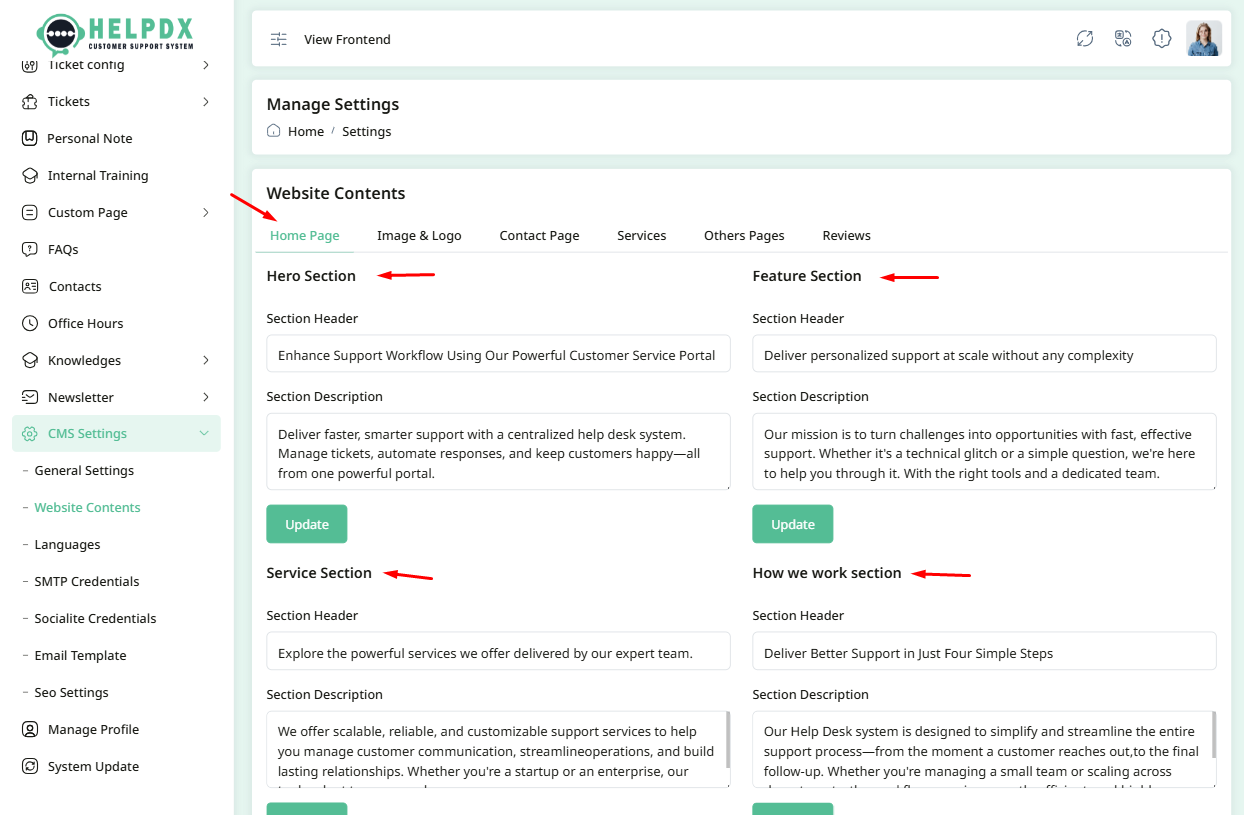
Image & Logos
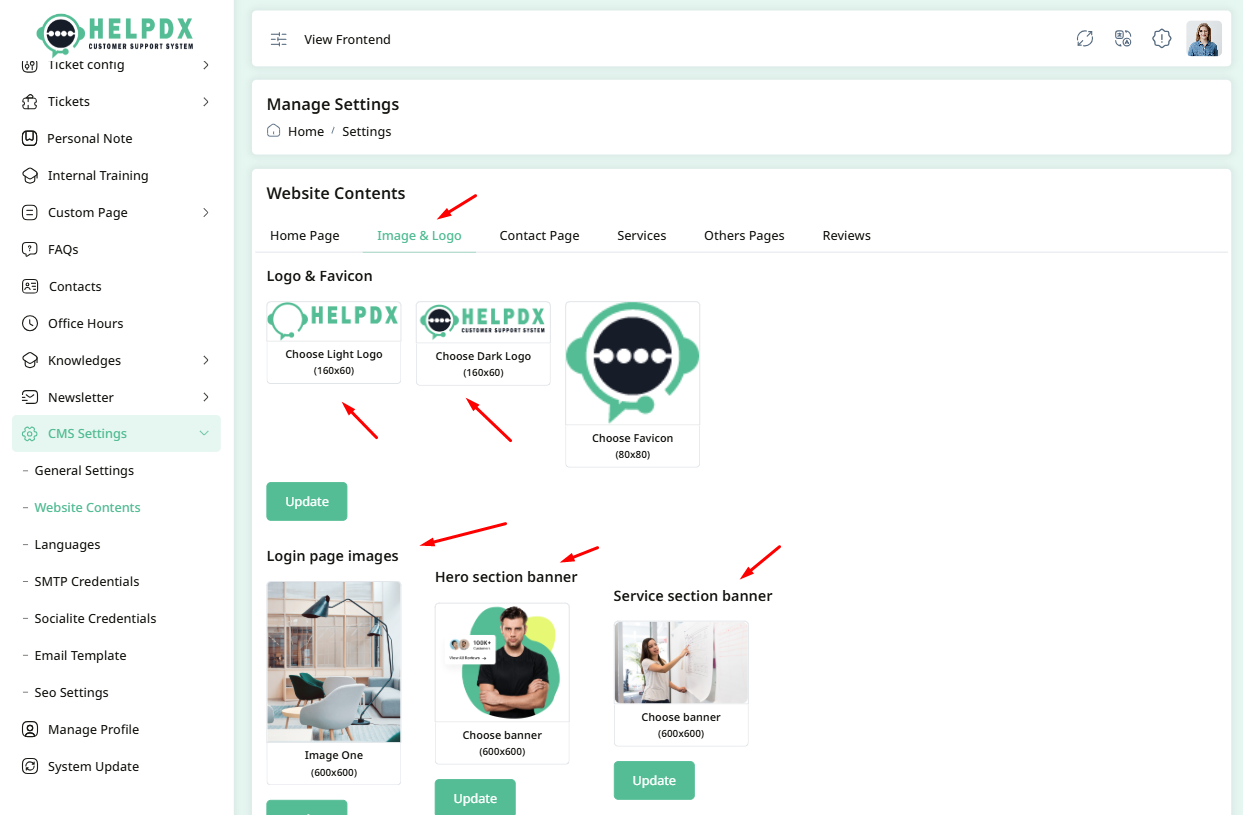
Contact Page

Service Page

Others Page
Review Page

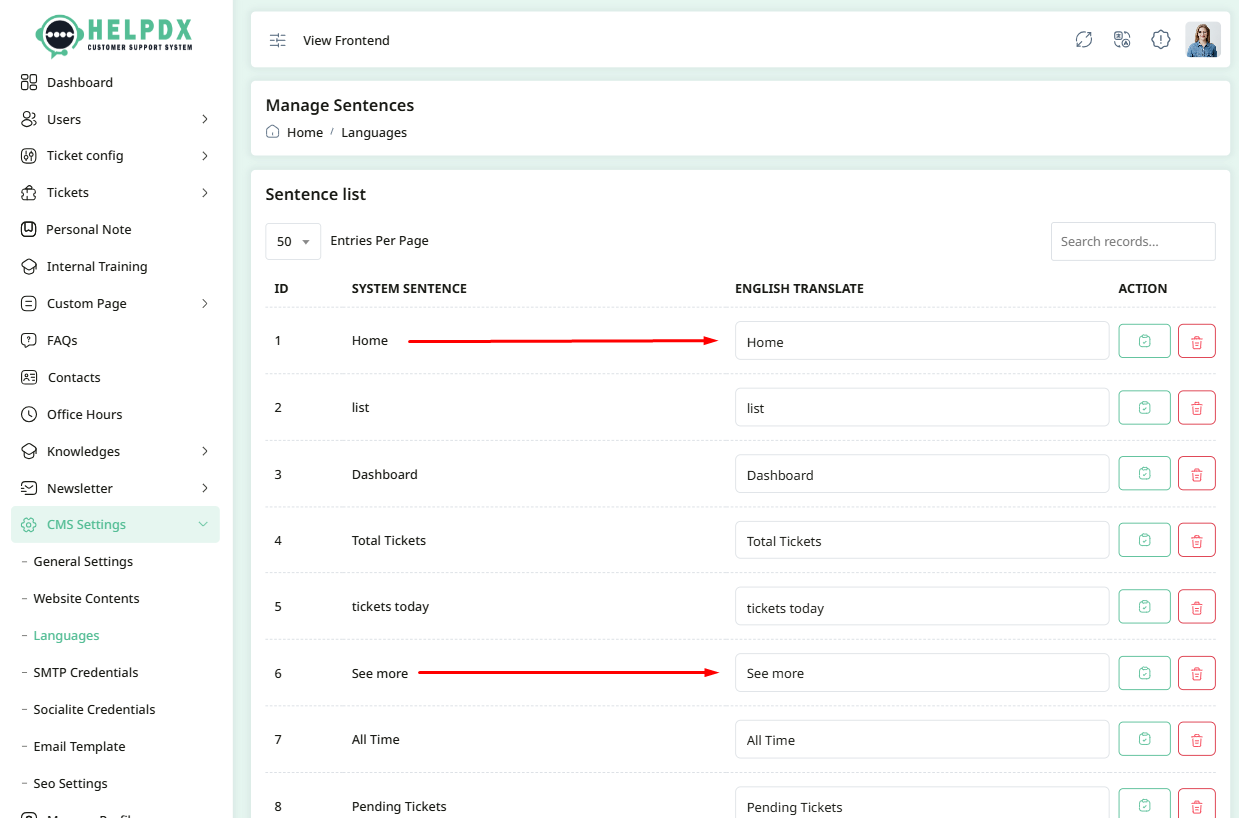
3. Language Settings
The Language Settings section allows you to manage multilingual support for your website. You can add new languages and customize translations to make your site accessible to a broader audience.
- Log in to the Admin Panel.
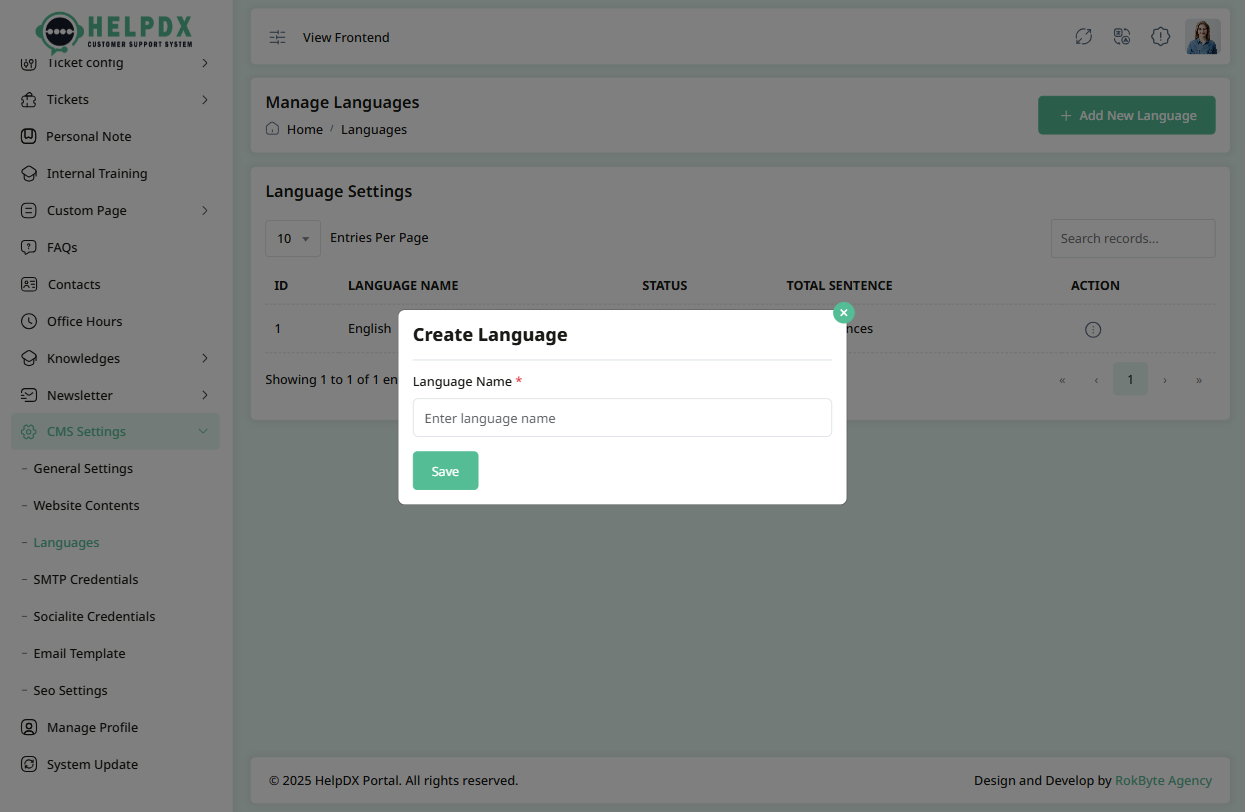
- Navigate to CMS Settings > Languages from the sidebar menu.
- Click the Add New Language button at the top-right corner.
- A modal form will appear. Fill in the required information, such as the Language Title.
- Click the Save button to add the new language.

Manage Languages (Edit, Delete, or Update Translations)
You can manage existing languages using the Edit, Delete, or Change Sentence options available in the language list.
- Click the three-dot menu (⋮) beside the language you want to manage.
- Select Delete to remove a language. A confirmation popup will appear—click confirm to delete permanently.
- Select Edit to rename the language. Make your changes and click the Update button.
- Select Change Sentence to modify the translation text.
- Click Make as Active to set a language as the active language for the application. All other languages will be deactivated, and only the active language's translations will be reflected throughout the entire application.
- After clicking Change Sentence, a translation table will appear. It includes the system default text and a field for your translated version. Edit the translation as needed, then click the checkmark icon to save your changes.
Edit Language
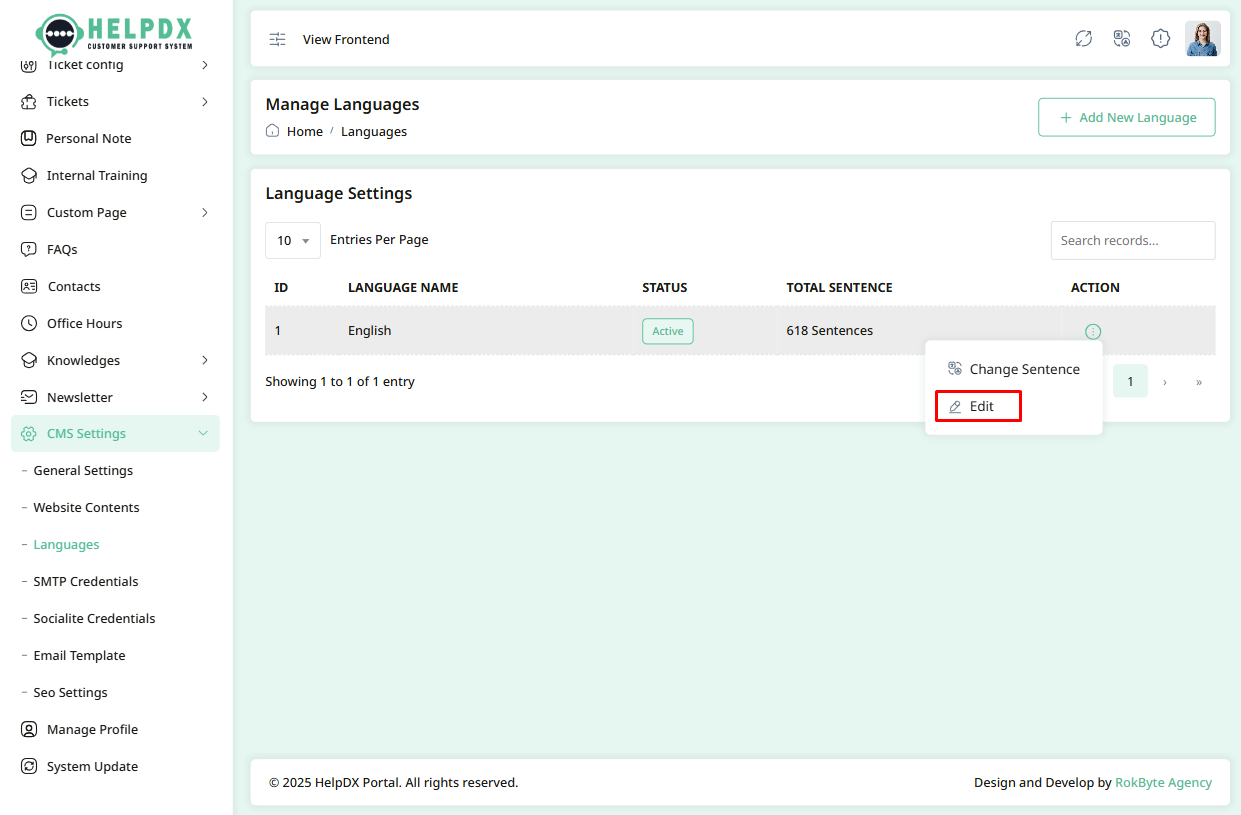

Delete Language


Change active status


Change Translations

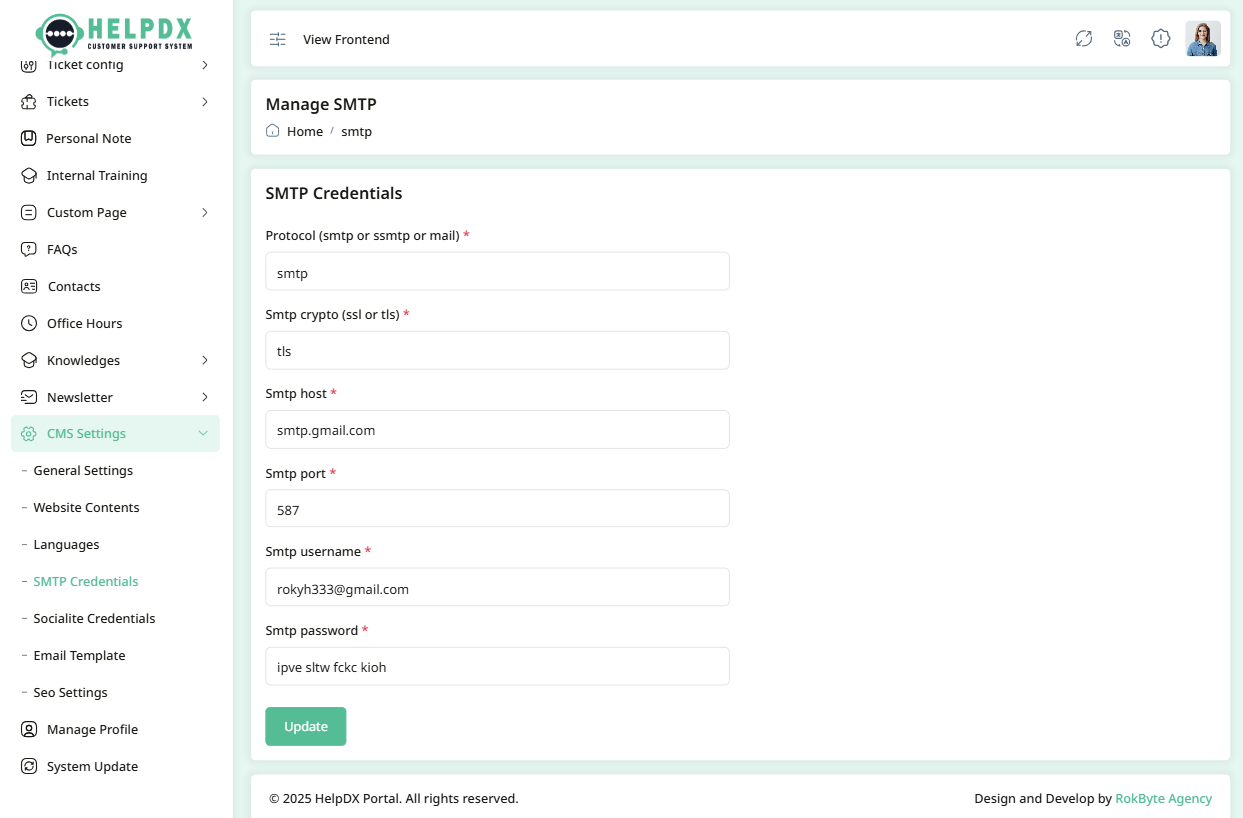
4. SMTP Credentials
Configure SMTP settings to enable the system to send emails (e.g., for contact forms, notifications, newsletters). You'll need to enter server, port, encryption method, username, and password.
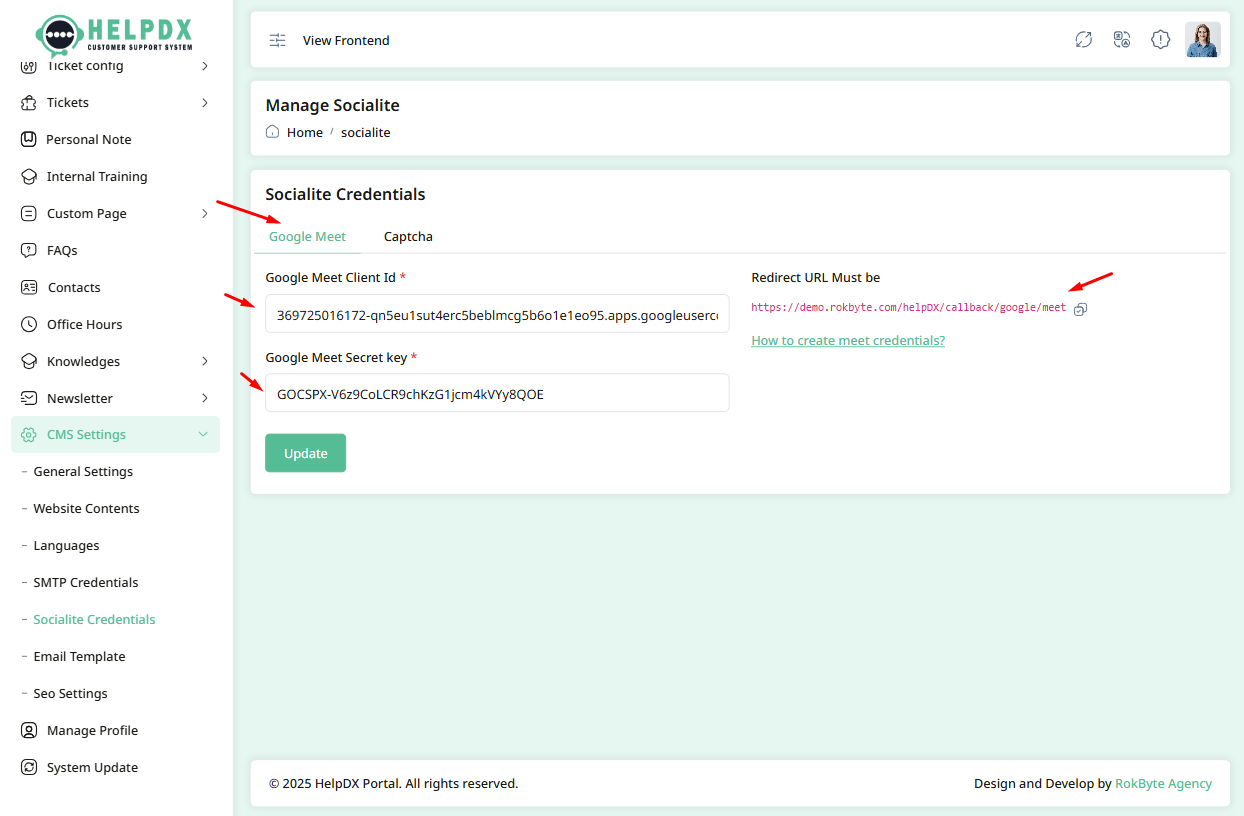
5. Socialite Credentials
The Socialite Credentials section allows you to configure third-party integrations such as Google Meet, and Google reCAPTCHA. These settings enable users to log in via social media, connect to Google services, and add security through CAPTCHA verification.
Google Meet Credentials
- Log in to the Admin Panel.
- Navigate to CMS Settings > Socialite Credentials.
- Click on the Google Meet tab.
- You’ll find the required Redirect URL for setting up your Google Project.
- Enter your Client ID, Client Secret.
- For assistance, click the "How to create Google Meet credentials" guide.
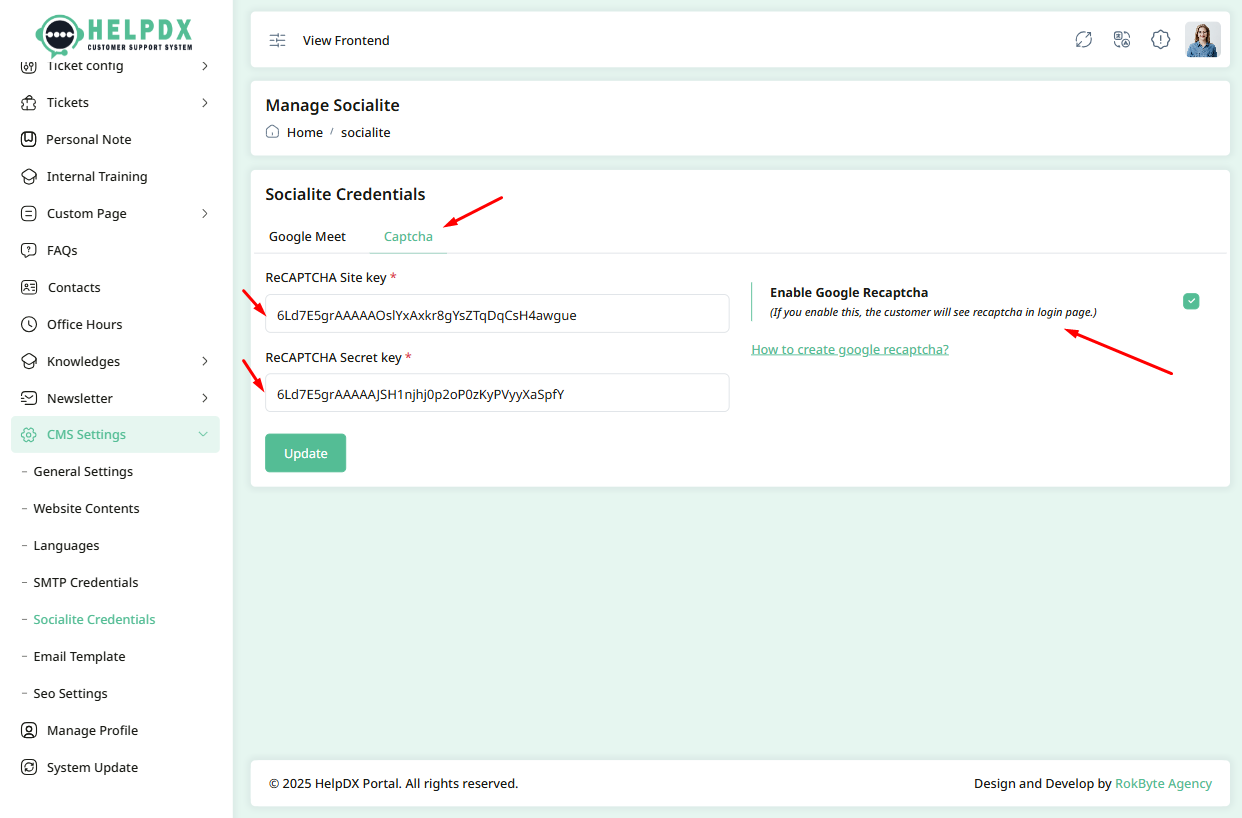
Google reCAPTCHA
- Log in to the Admin Panel.
- Navigate to CMS Settings > Socialite Credentials.
- Click on the Google reCAPTCHA tab.
- Check the Enable Google reCAPTCHA box to activate it on login and signup pages.
- Enter your Site Key and Secret Key from your Google reCAPTCHA account.
- If you need help, click the "How to create Google reCAPTCHA" link for a detailed setup guide.
6. Email Templates
The Email Templates section allows you to customize the layout and content of system-generated emails. These emails are sent for actions such as user registration, ticket notifications, password resets, and contact form replies.
- Log in to the Admin Panel.
- Navigate to CMS Settings > Email Template from the sidebar menu.
-
You will see a list of available templates, including:
- New User Registration – Enable this to send an email notification to users when they register on the application.
- New Ticket to Admin – Enable this to notify the admin when a new support ticket is created.
- New Ticket to Customer – Enable this to notify customers when a new ticket is created for them.
- Ticket Reply to Customer – Enable this to notify customers when an admin or agent replies to their ticket.
- Forgot Password – Enable this to allow users to receive a reset password email when they request it.
- Click Edit to modify a template. A modal will appear where you can update the subject and body of the email as needed.


7. SEO Settings
Update SEO meta titles, keywords, and descriptions to improve your website’s visibility in search engines.

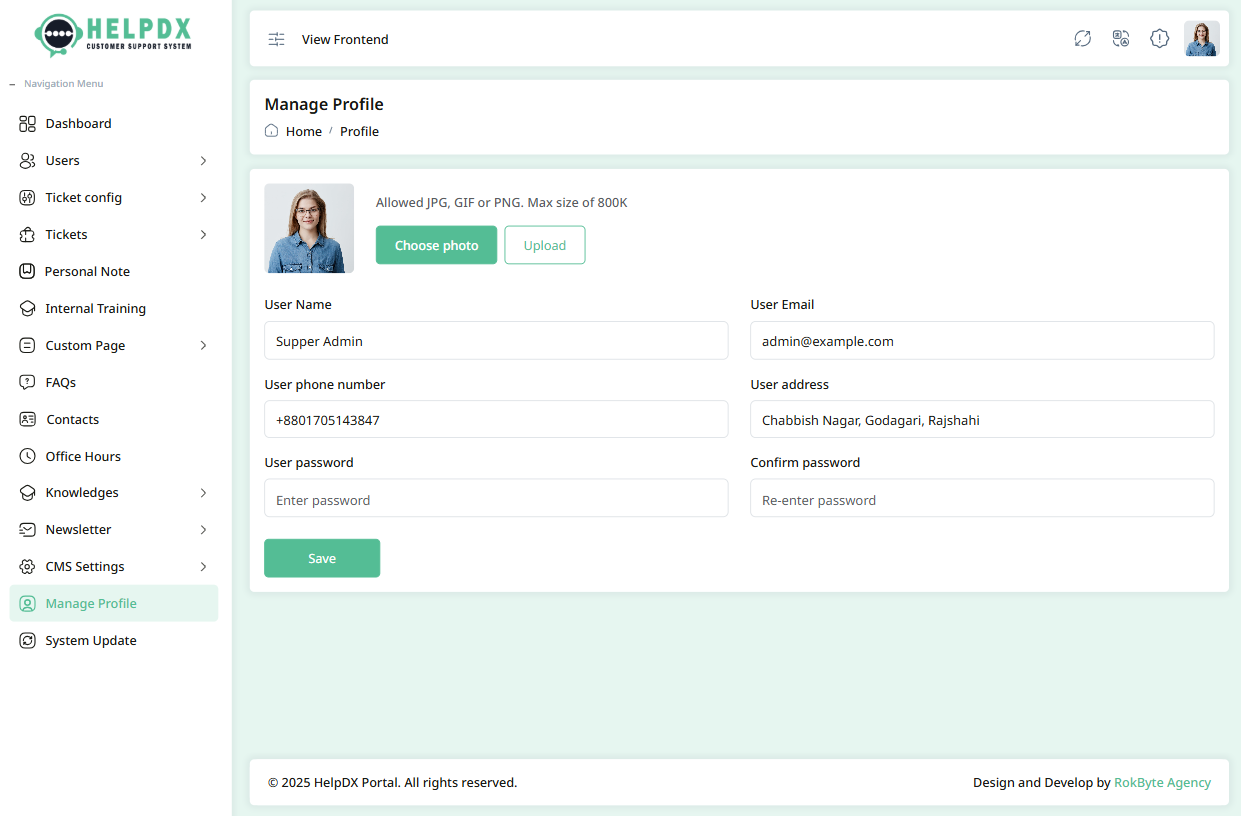
Manage Profile
The Manage Profile section allows you to update your profile information such as name, email, profile image, and more.
- Log in to the Admin Panel.
- Navigate to Manage Profile from the sidebar menu.
- The profile page will appear. Update the fields as needed (e.g., Name, Email, Phone, etc.).
- After updating the information, click the Update button to save changes.
System Update
The System Update section allows you to manage and update the system settings, including software updates, security patches, and more.
- Log in to the Admin Panel.
- Navigate to System Update from the sidebar menu.
- The system update page will appear. Review the available updates. Also you can see the software information here.
- You will get the update file to our products updates folder. Download the products again and check update folder you can see the zip file with version name.
- After selecting the update file, click the Update button to save changes.

Co-admin Panel
The Co-admin Panel allows your co-admins to manage your website with limited access to certain features. This includes managing content, managing tickets, faqs, and other settings without having full admin privileges.
- Log in to the Co-admin Panel.
- Navigate to Dashboard from the sidebar menu.
- The dashboard page will appear. Review the available options for managing tickets.

Sidebar Menu Pages Overview
The HelpDX sidebar provides quick access to all major modules and features. Here is a summary of each sidebar menu page and its purpose:
- Dashboard: Overview of tickets, stats, and quick links to recent activity.
- Personal Note: Create and manage private notes for reminders or documentation. Check our Personal Note section for more details.
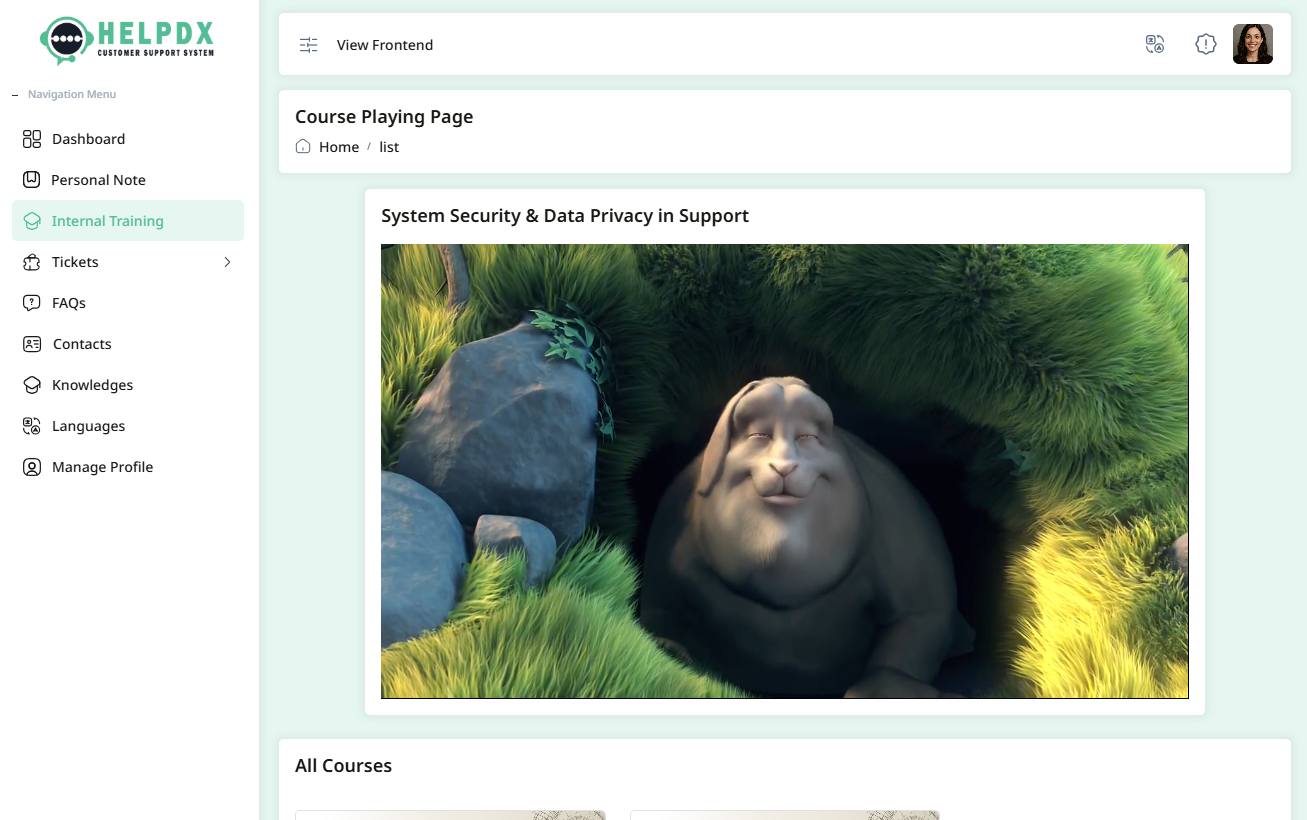
-
Internal Training: In this section co-admin can
see their training materials and see enrolled videos.
- Tickets: Submit, view, and manage support tickets. Includes filtering and assignment. Check out Tickets section for more details.
- FAQs: Add, edit, and categorize frequently asked questions for users. Check out FAQs section for more details.
- Contacts: Manage contact information for clients, team members, or vendors. Check out Contacts section for more details.
- Knowledges: Create and organize knowledge base articles for self-service support. Check out Knowledges section for more details.
- Languages: Add and manage language packs for multilingual support. Check out Languages section for more details.
- Manage Profile: Update your personal information, password, and profile image. Check out Manage Profile section for more details.
Customer Panel
The Customer Panel allows your customers to create tickets and read knowledge base articles.
-
Dashboard: Customers can see their tickets
status, How many tickets are created how many tickets opened,
solved, and closed.

-
Manage Ticket:Customers can view and manage
their support tickets. Customer can create tickets without login or
by logging into their account.
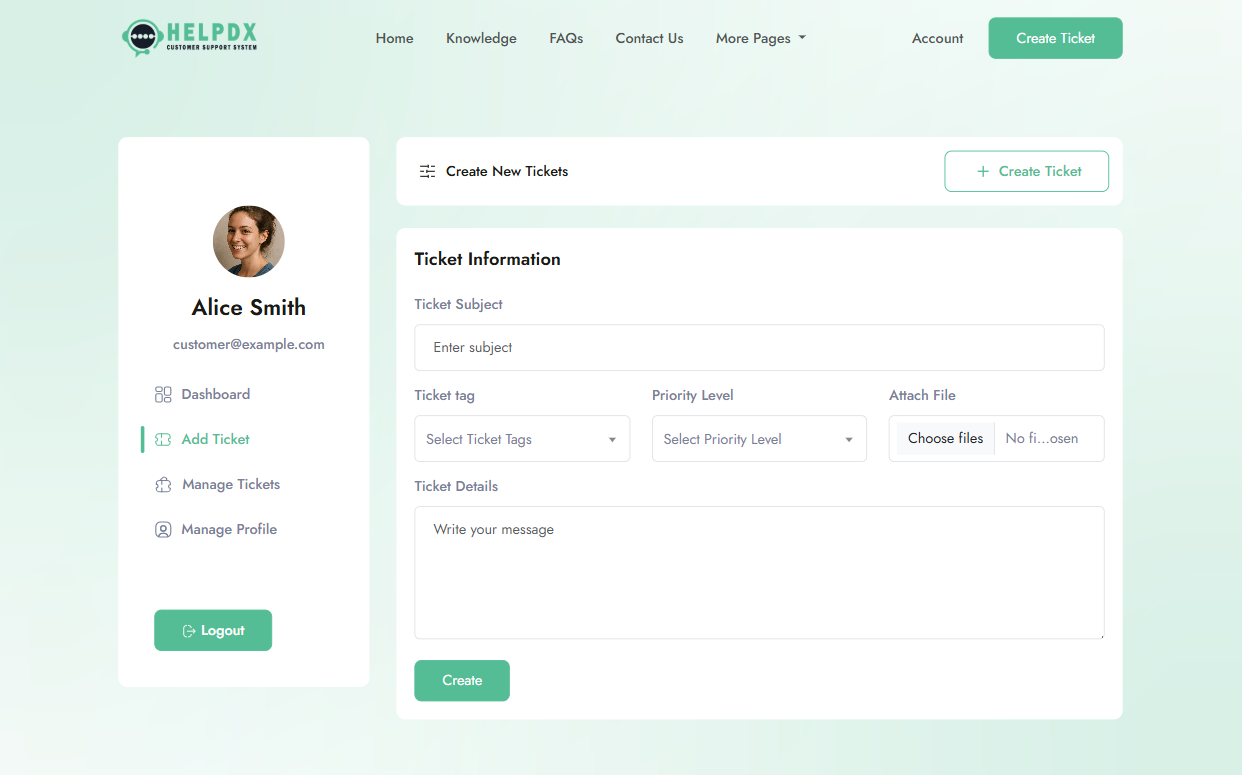

Ticket Details and View


-
Update Profile: Customers can update their
profile information, including email and password.

- View Knowledge Base: Customers can browse and search for articles in the knowledge base.